This article covers the various ways to create a one-time, ad-hoc task for a client. You can also create scheduled (recurring) tasks, and one-time tasks can be set to recur.
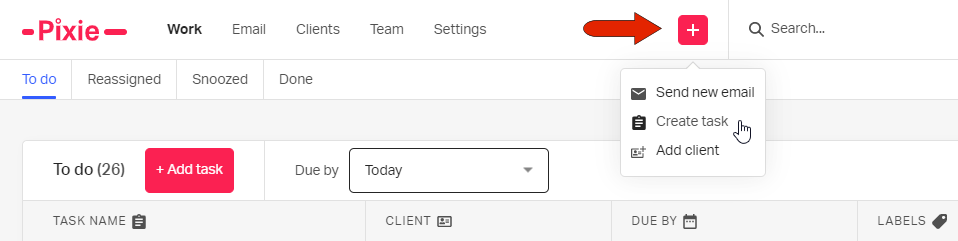
From any Pixie screen, you can click the Add icon at the top and choose Create task.
If your client list is open, you can select one or more clients for whom you want to create a task, and click the Create task button. The Schedule task button can be used for tasks created from a task template. You can apply a client filter to narrow the list to specific clients.

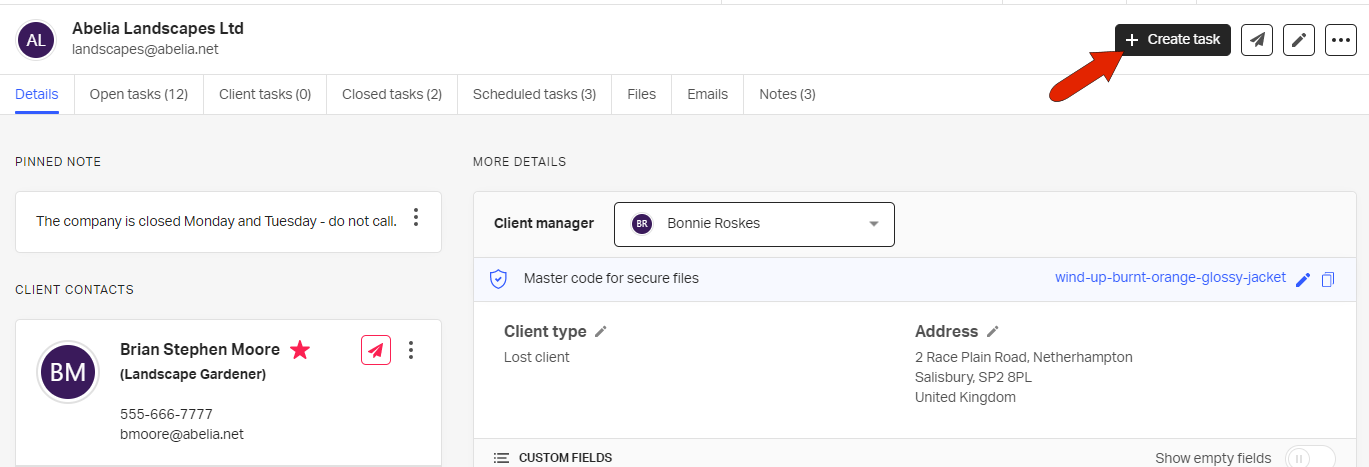
If you’re viewing client details, you can click Create task.
You can also create a task from an email.
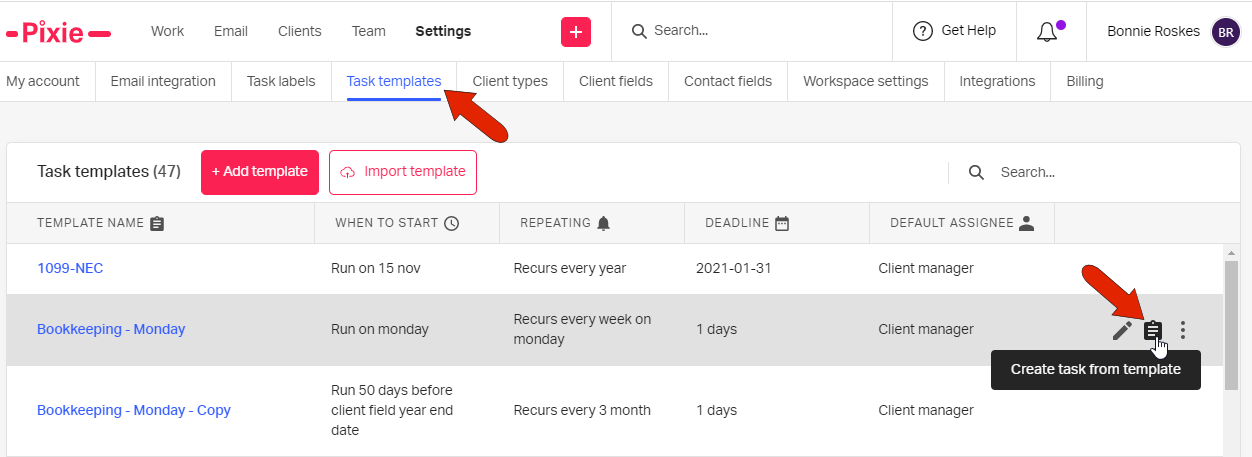
Finally, if you’re a workspace admin, you have access to task templates. From here, you can find the template you want to use as a basis for a task, and click Create task from template at the right.
With any of the above methods, the task itself is created in a series of steps. The steps that appear depend on how you started creating the task.
The first step is to assign a task name, deadline, and team member responsible for the task. Choose the client if not already specified.

Choose a template for a pre-populated task, or to start from scratch, choose Custom task.
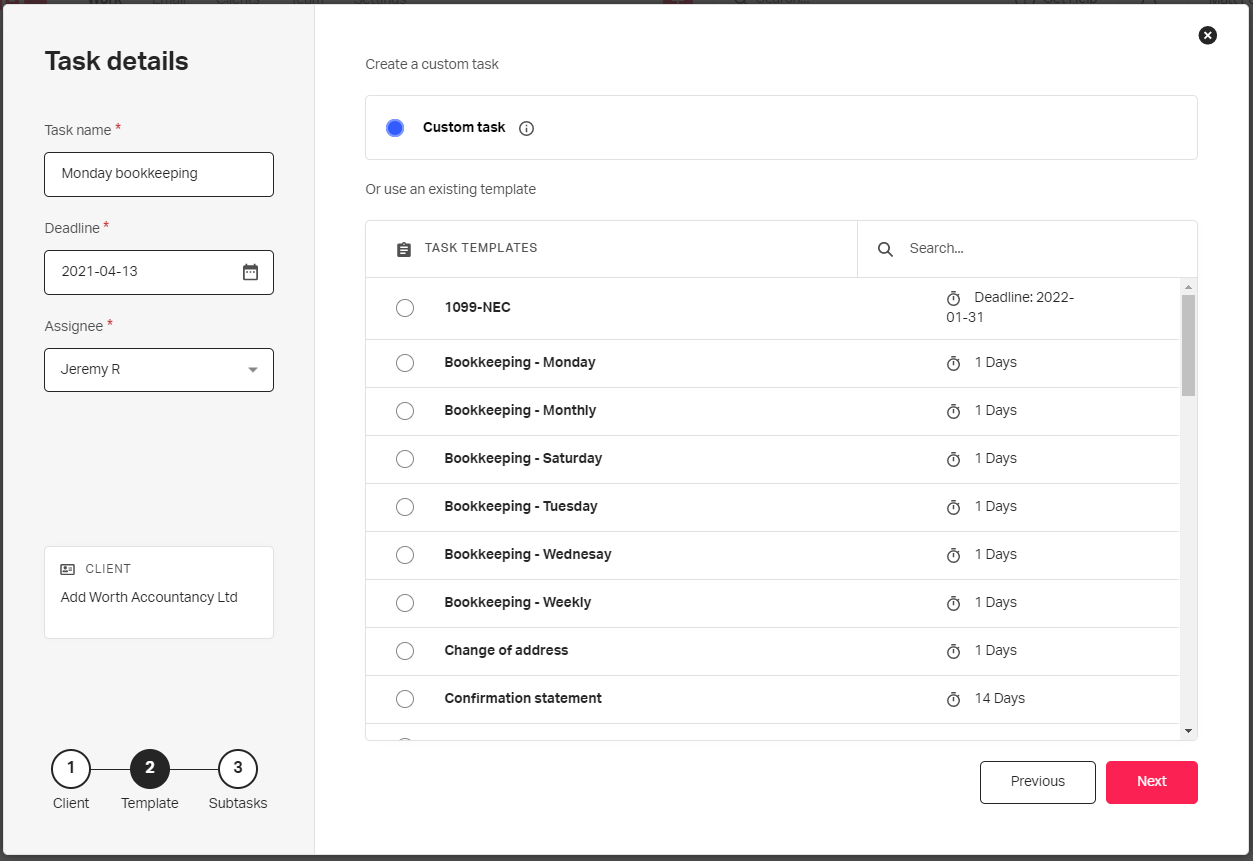
The last step is to create subtasks in the case of a custom task, or keep or edit subtasks from a task template.
See also:
