Subtasks are the “meat” of a task - they lay out what you need to do. This article discusses adding subtasks to an ad-hoc (one-time) task, but the same types of subtasks can be added to task templates for recurring tasks.
Note: Employee users do not have access to task templates. But they can create one-time, ad-hoc tasks, which can be set to recur.
There are four types of subtasks: instructions, automated emails and manual emails, and internal deadlines. If you’re a workspace admin, it’s worthwhile to explore the structure of some of the default task templates provided in your account.
Subtasks can be added while creating a task, or while editing a task. The subtask creation interface depends on how the task was created or is being edited.
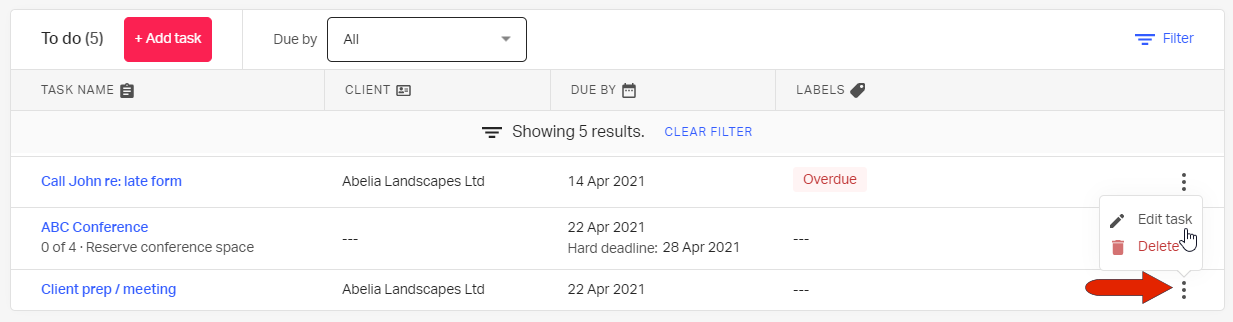
This example users the task editor, but you’ll find an Add subtask button in any form of task editing.
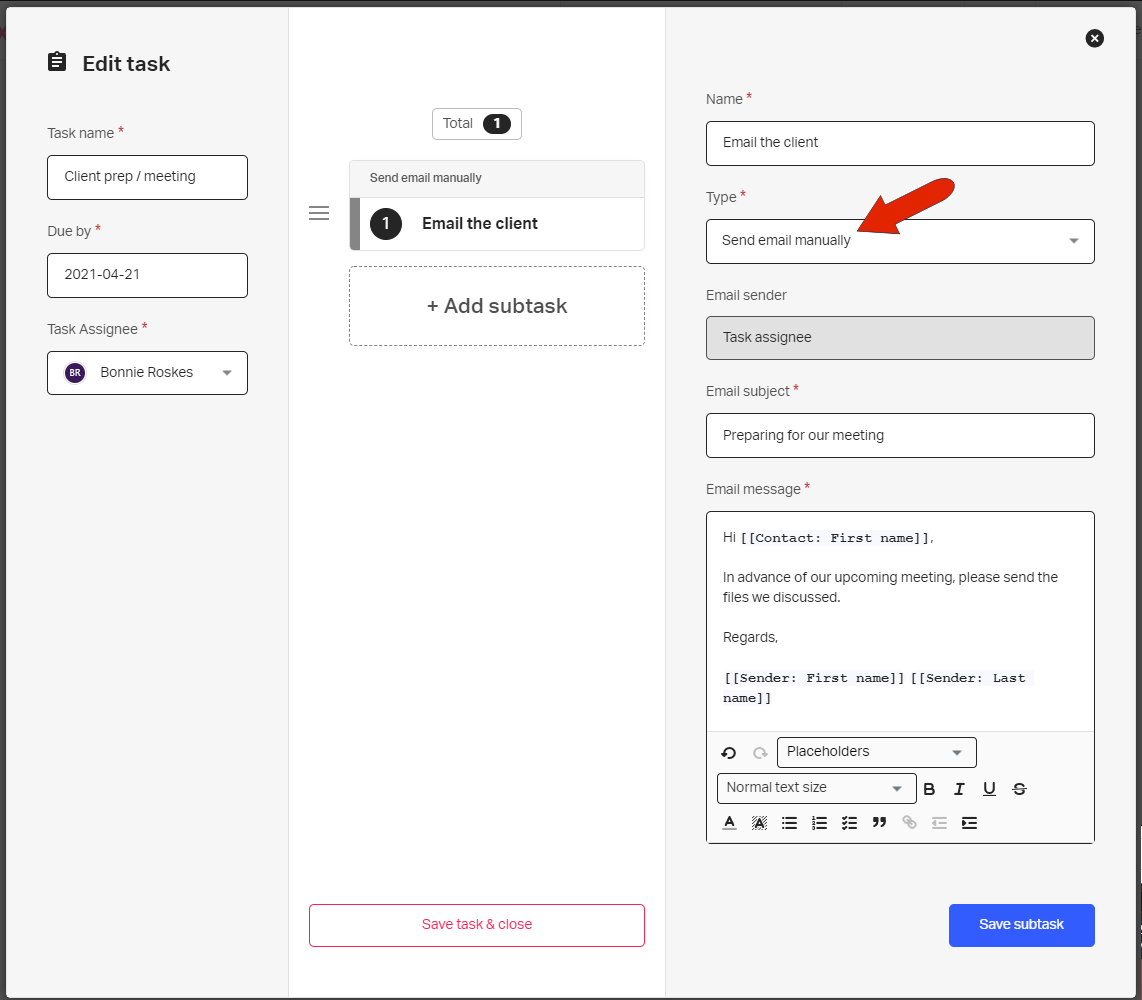
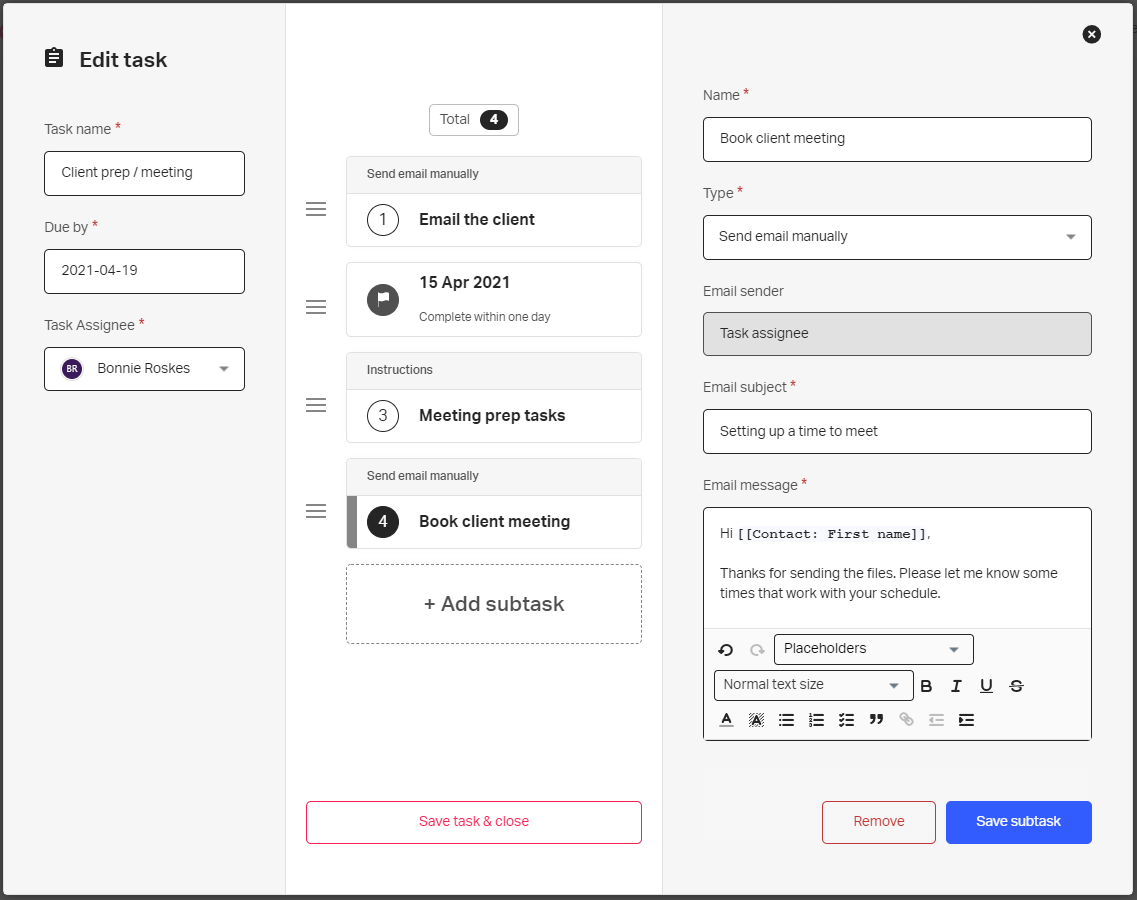
In this example, the first subtask is a manual email that will be sent to the client. Be sure to save each subtask as you add them.
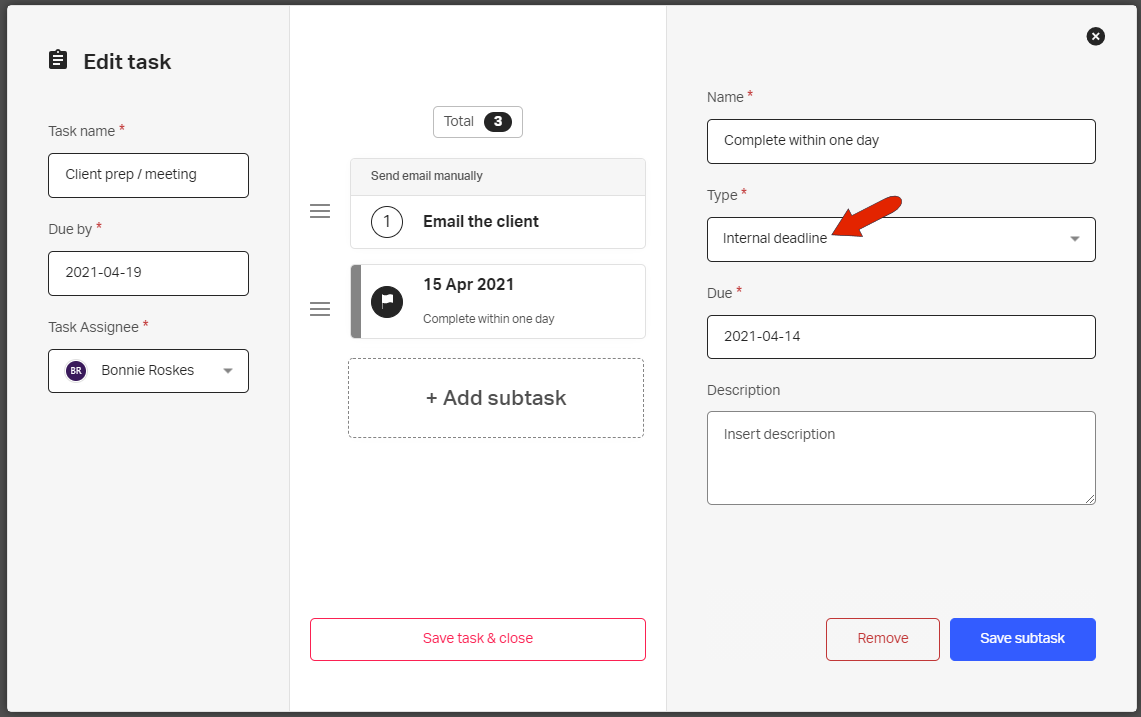
The second task is an internal deadline - the date before which the previous email task should be completed.
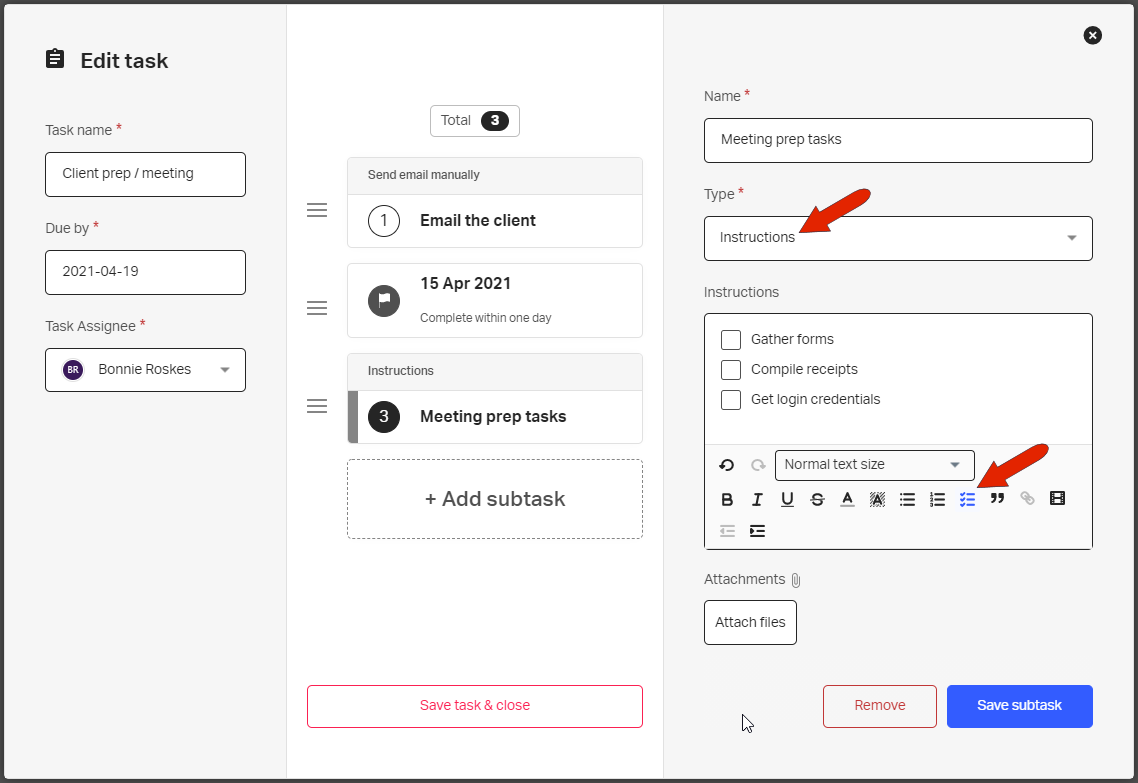
The third subtask contains instructions for the person responsible for the task. A list of actions can be formatted as a To-do list. Any task-related files can be attached here as well.
The last subtask is another email to the client.
Once all subtasks are added, you can begin working your way through the task. Or, if changes are needed, you can edit the subtasks.
See also:
