Note: If you make changes to a task, be sure to save before closing. If you change a subtask, be sure to save both the subtask and task before closing.
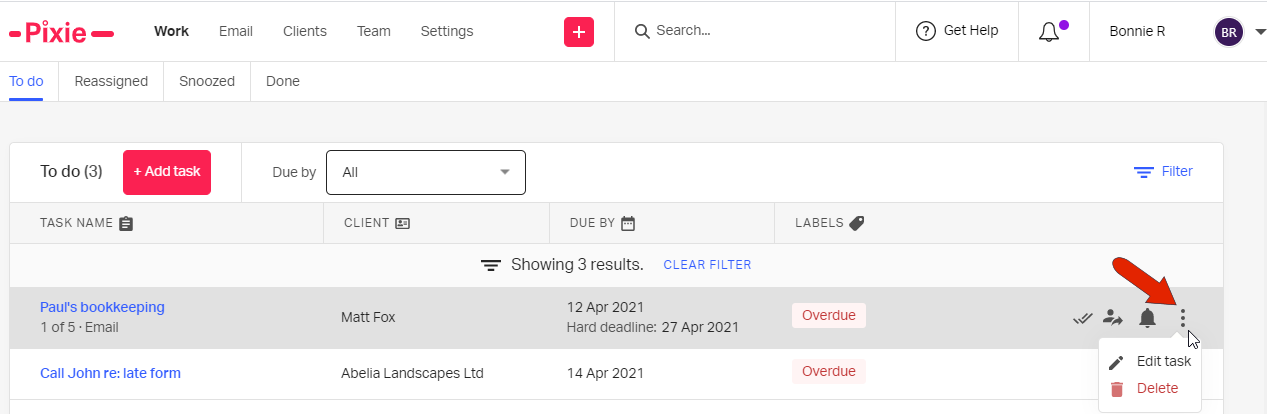
To edit a task or its subtasks, start in your Task List. Click the three-dot icon for the task and choose Edit task.
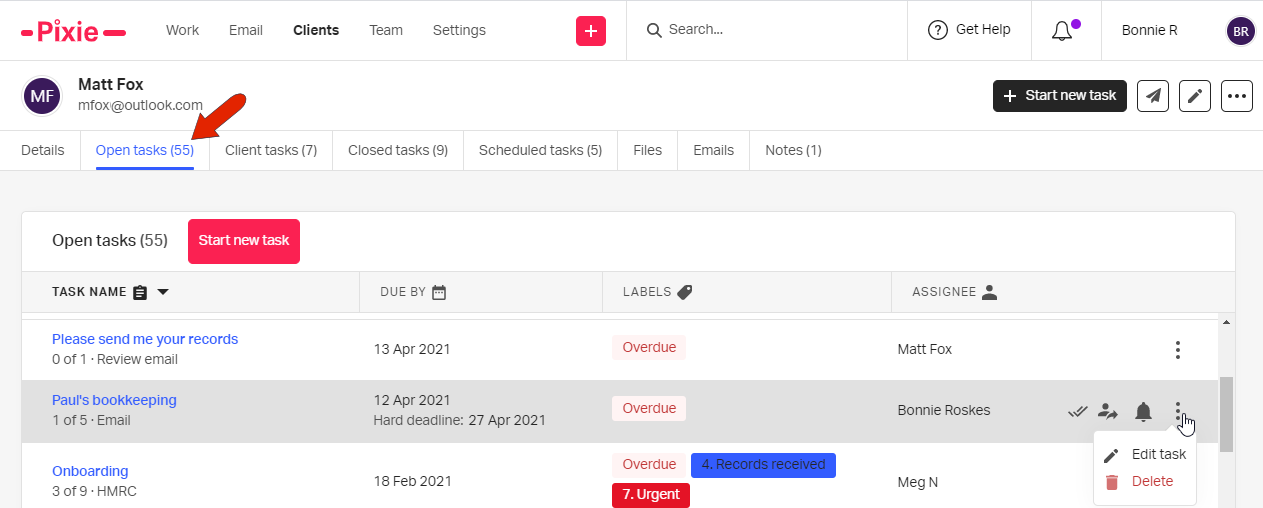
You can also access tasks from a client’s details page, in the Open tasks tab.
At the top of the task details page, if you hover over the task name, you can click the Edit icon to rename the task. Similarly, you can also change a task’s due date.

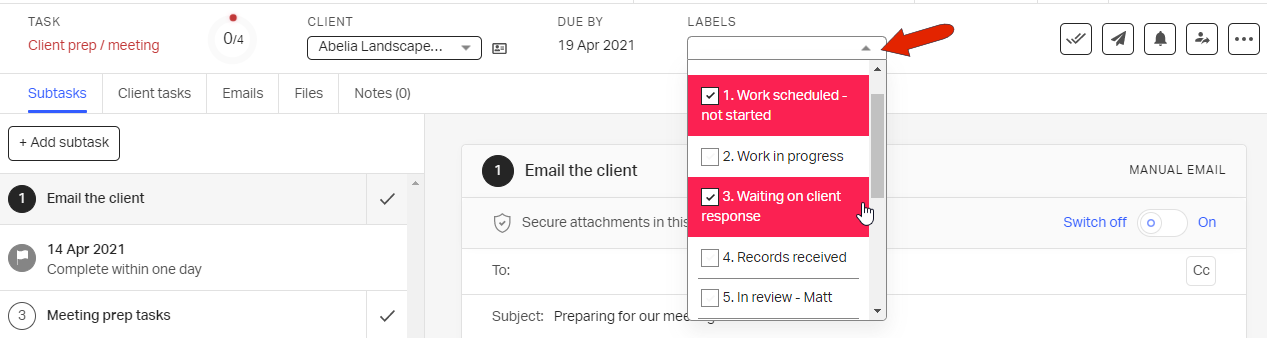
You can also choose a different client, or apply one or more task labels to indicate task status.
Subtasks can be added from here as well.

There are also tabs for adding client tasks, emails, files, and notes.

At the top right are icons to mark the task as complete, email the client, snooze the task, and reassign the task. The three-dot icon opens a menu with options to save the task as a template, apply an existing task template, or make a one-time task recur. If the task is already recurring, you’ll have an option to change its schedule.

To make changes to subtasks, click the three-dot icon, and choose Advanced task editor.

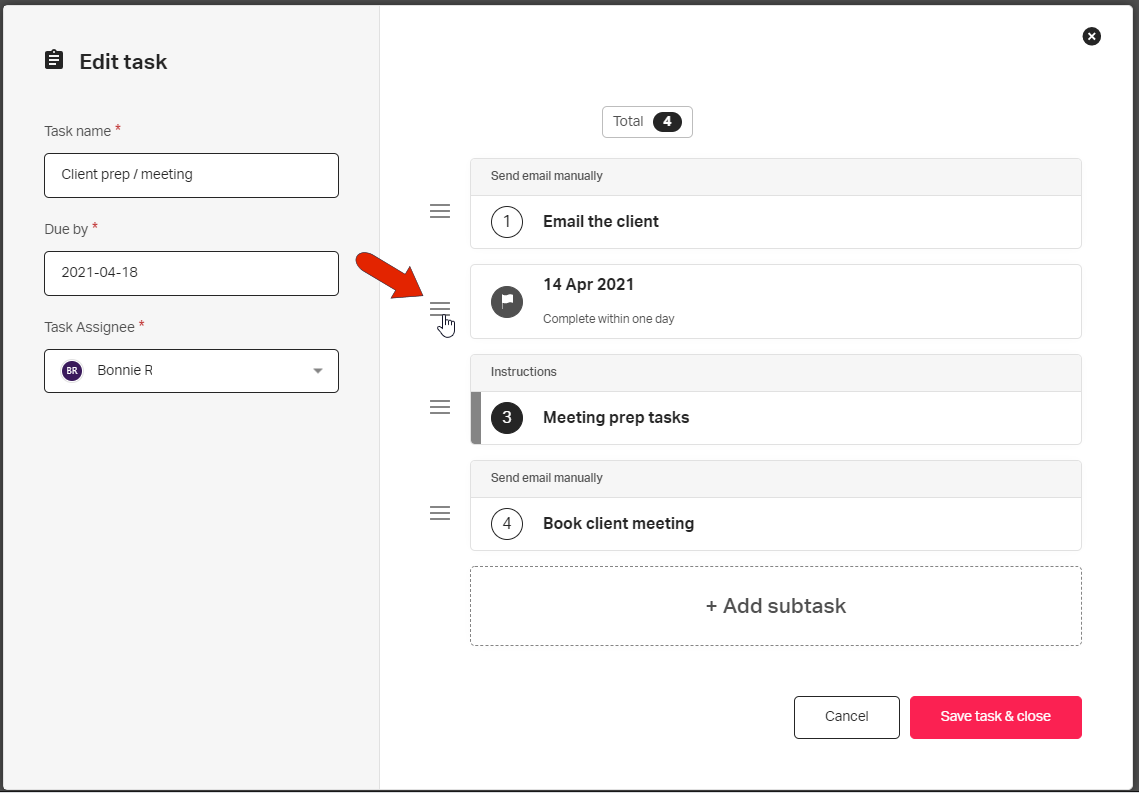
Clicking on a subtask opens its editing window, where you can change subtask type or content, or remove the subtask. New subtasks can be added here as well.
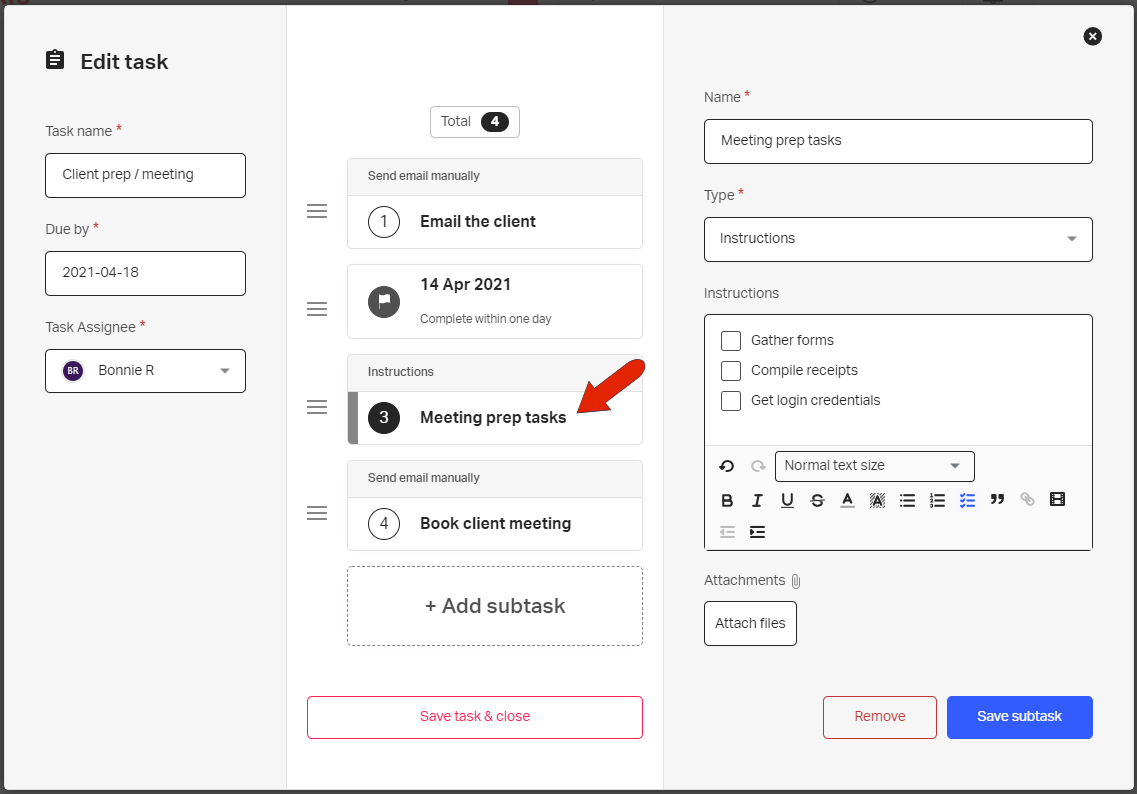
You can also reorder subtasks, by dragging and dropping a subtask by its three-line icon.
As mentioned at the top of this article, for any changes you make, be sure to save the task or both the subtask and task, before closing.
See also:
