Please note: For workspace admins only
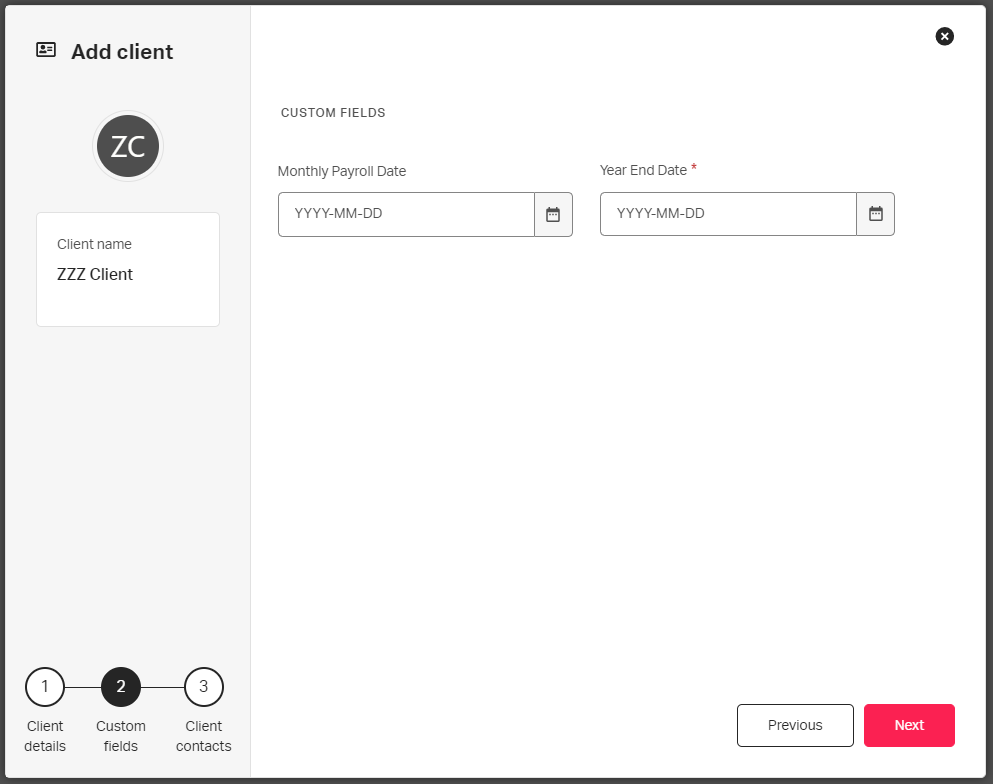
When adding a client, after adding the address details, the second step is to fill out custom fields.
Your account may start pre-loaded with custom fields such as:
Monthly Payroll date
Year-End Date
Date of Birth
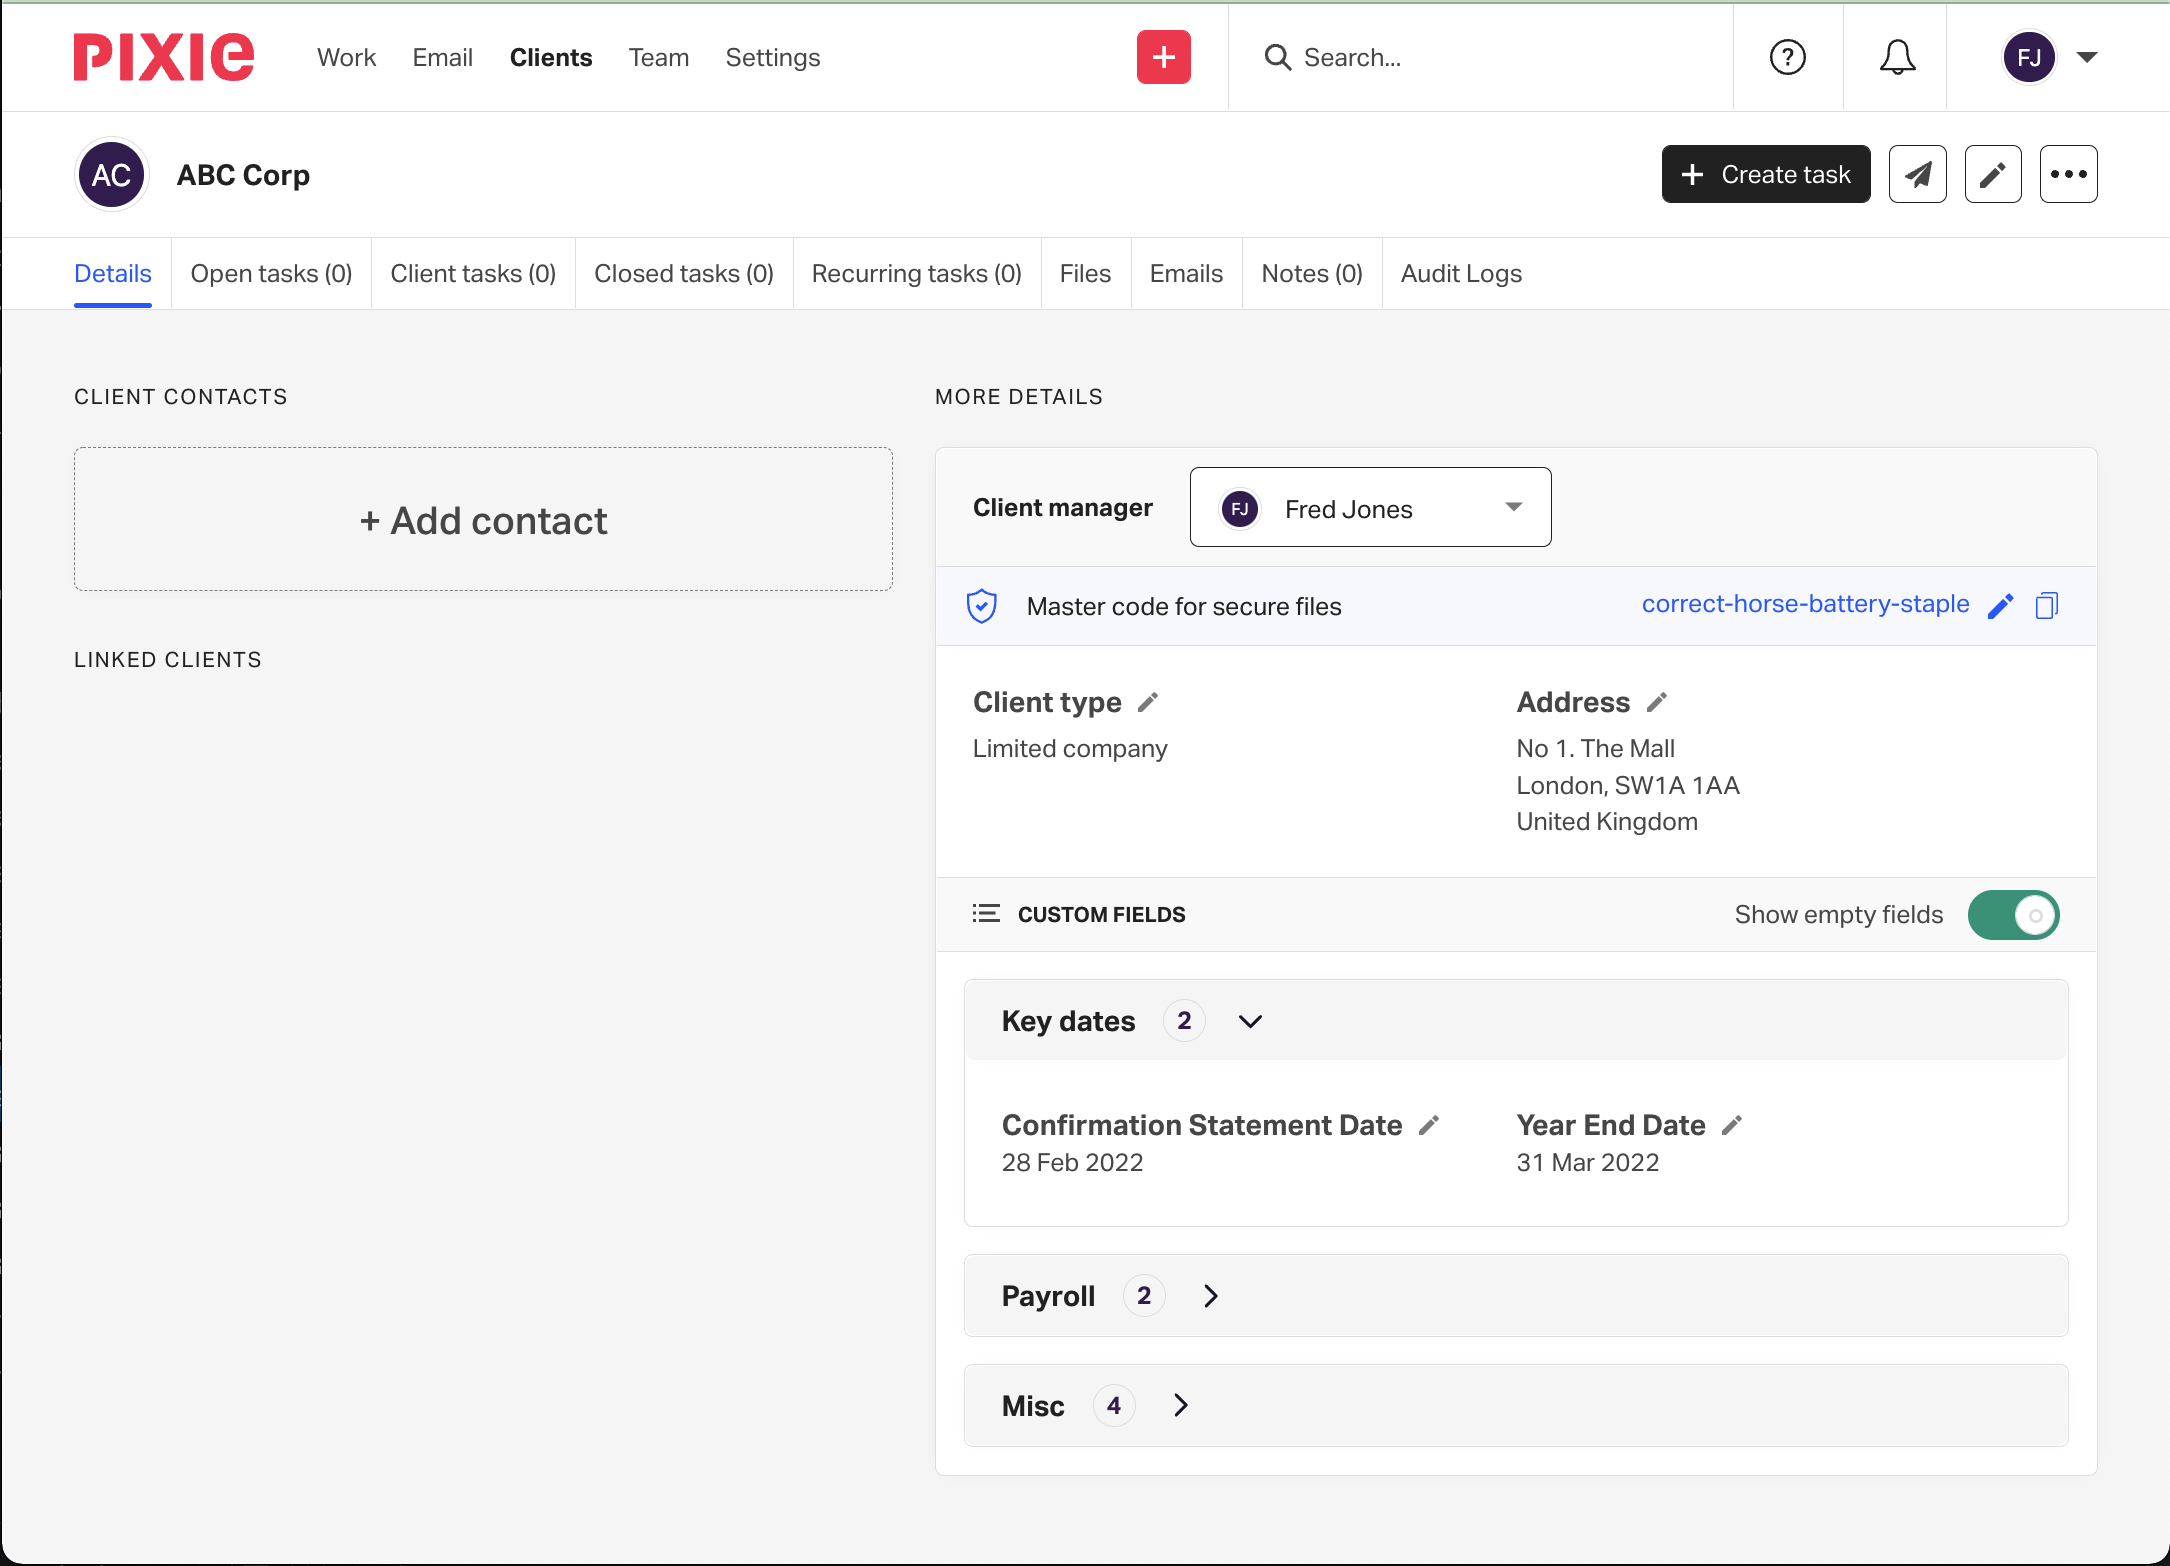
These fields are visible when editing a client record and setting up client filters.
In this article, we will discuss how you can delete, organise, and add to this list of custom fields to customise Pixie to your business needs.
To configure client fields, first go to Settings, and open the Client fields tab. The default fields are listed, and you can add more as needed.
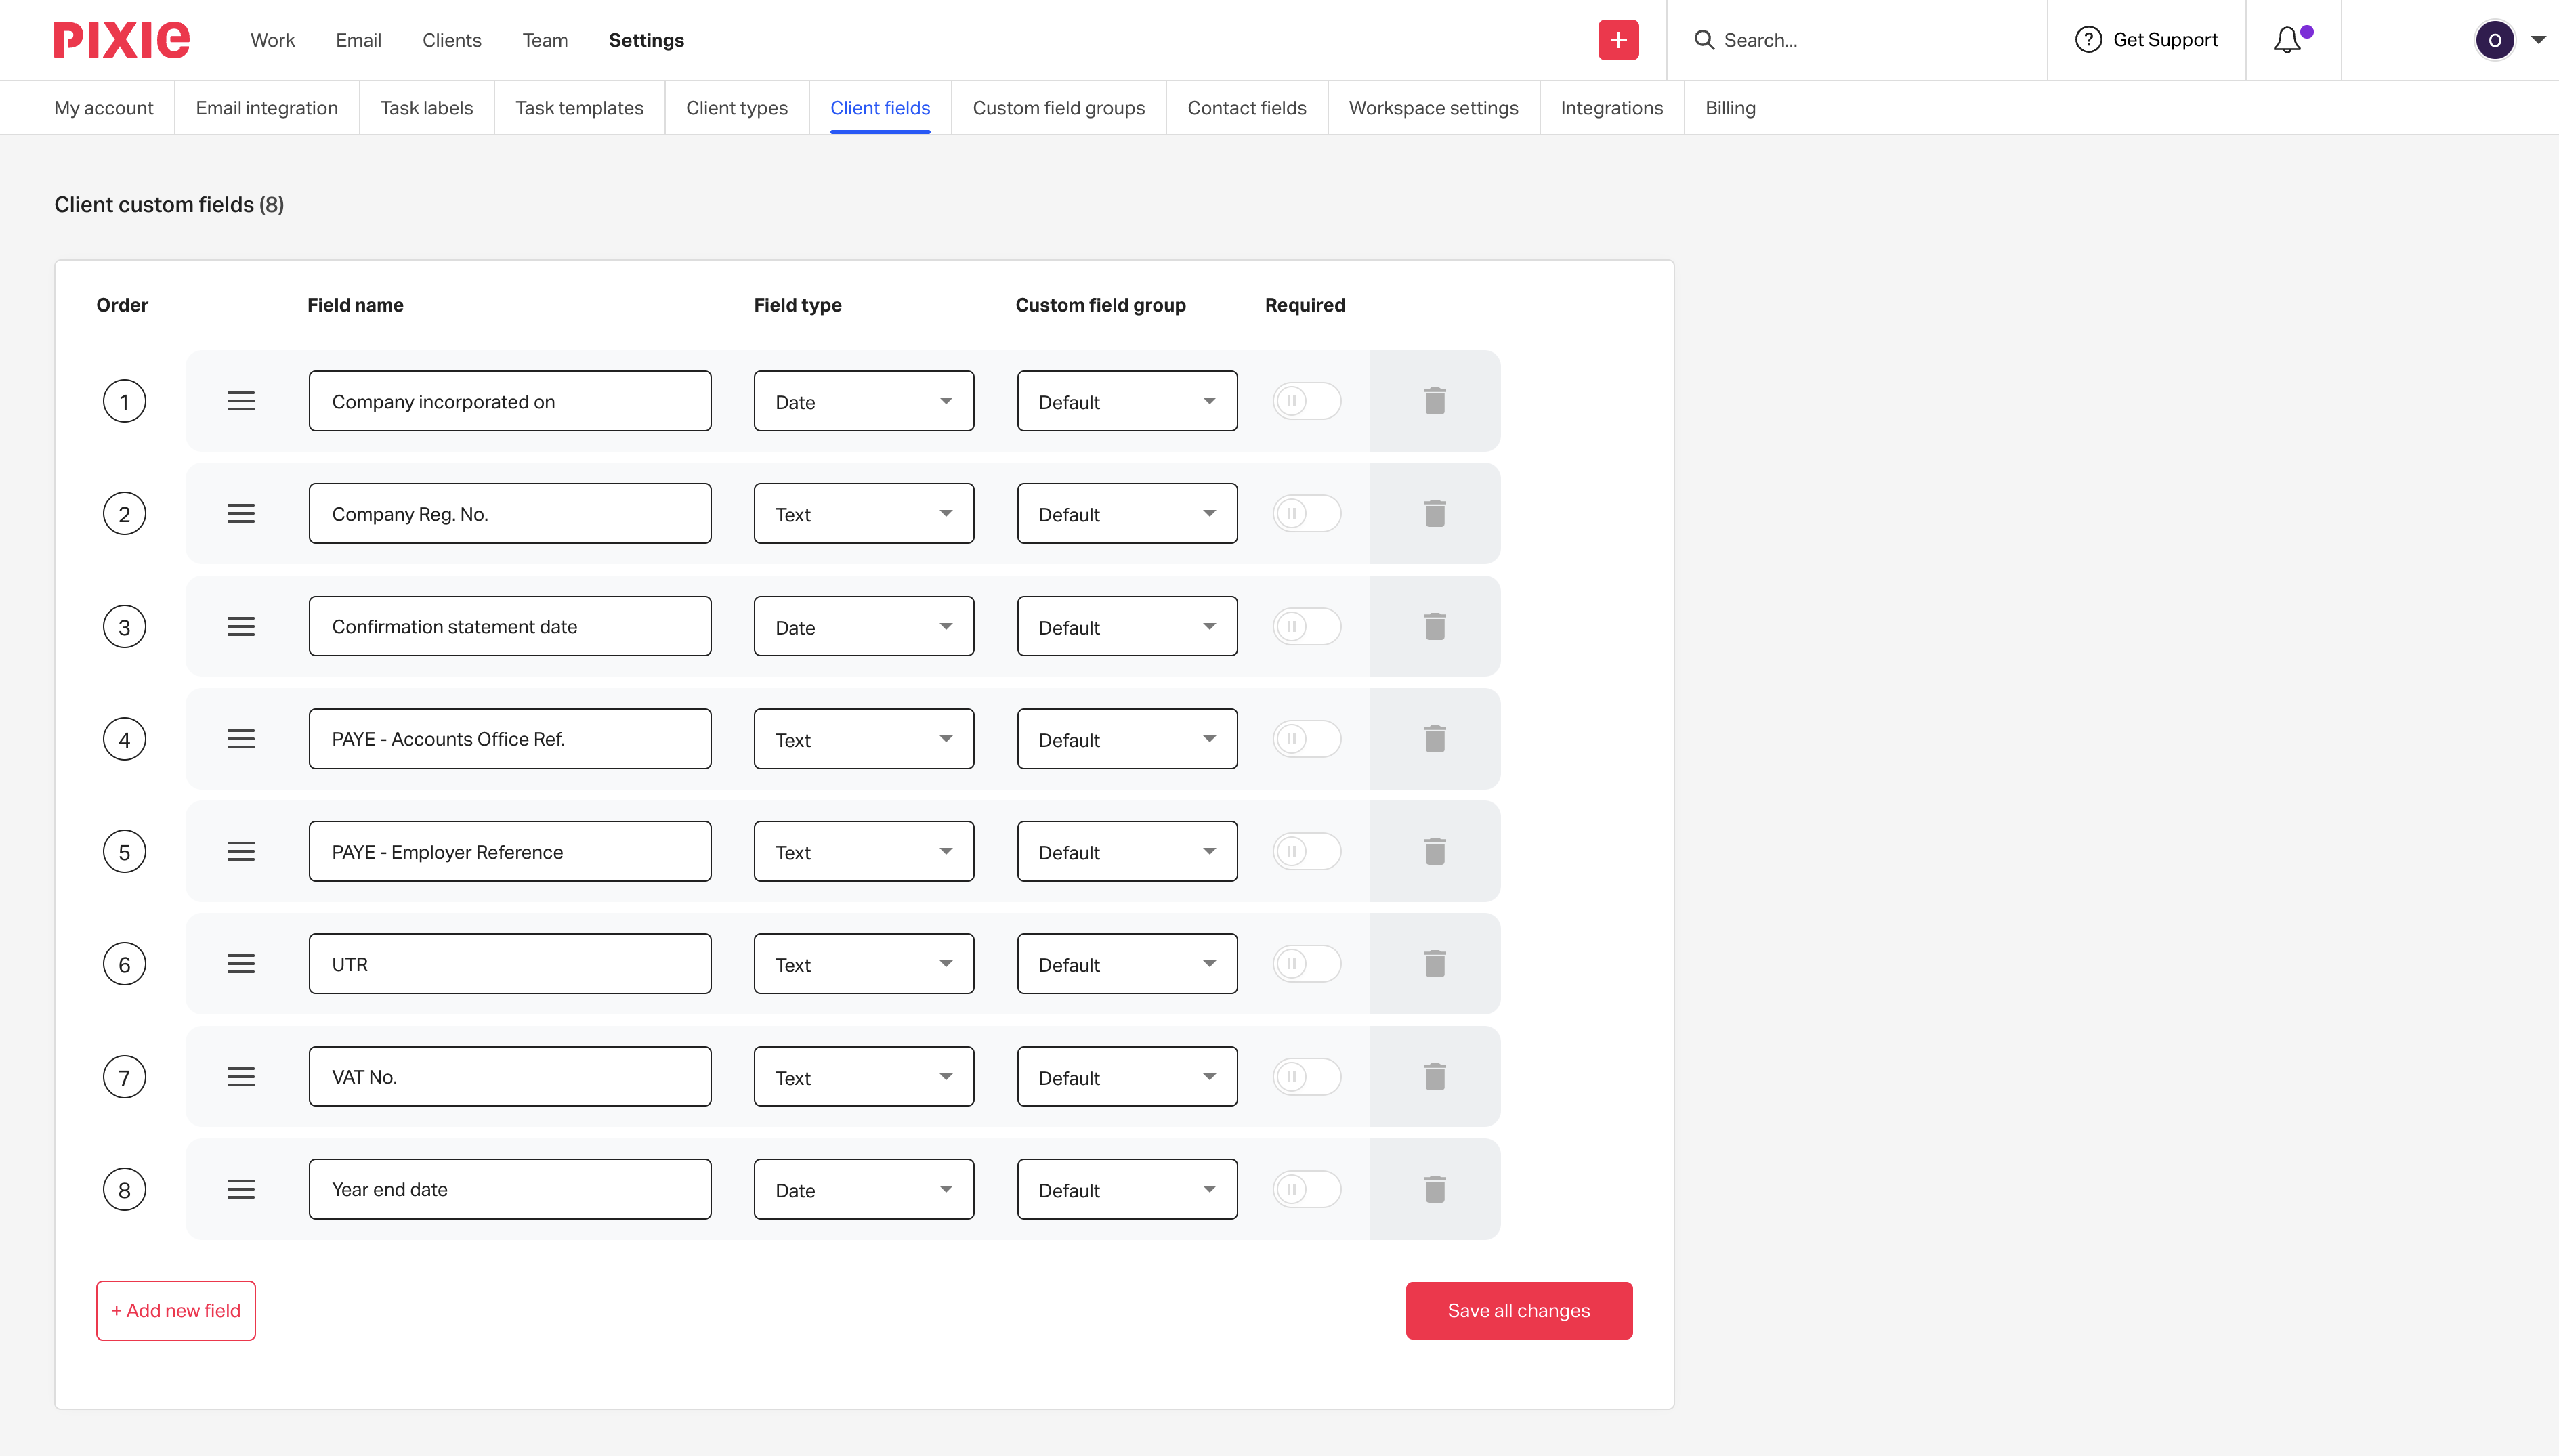
Each custom field has a field type: Text, Number, Date, or Yes/No. You can also decide whether each field should be required when setting up clients.
Be sure to click Save all changes.
Fields are displayed in the order they are created, so when you add a new field, it will appear at the bottom of the existing list.
There are a number of different ways you can organise your fields, the first being by reordering them into a list that suits your needs.
To reorder your list of custom client fields, simply click and drag them into the order you desire using the three bars to the left of the Field name.
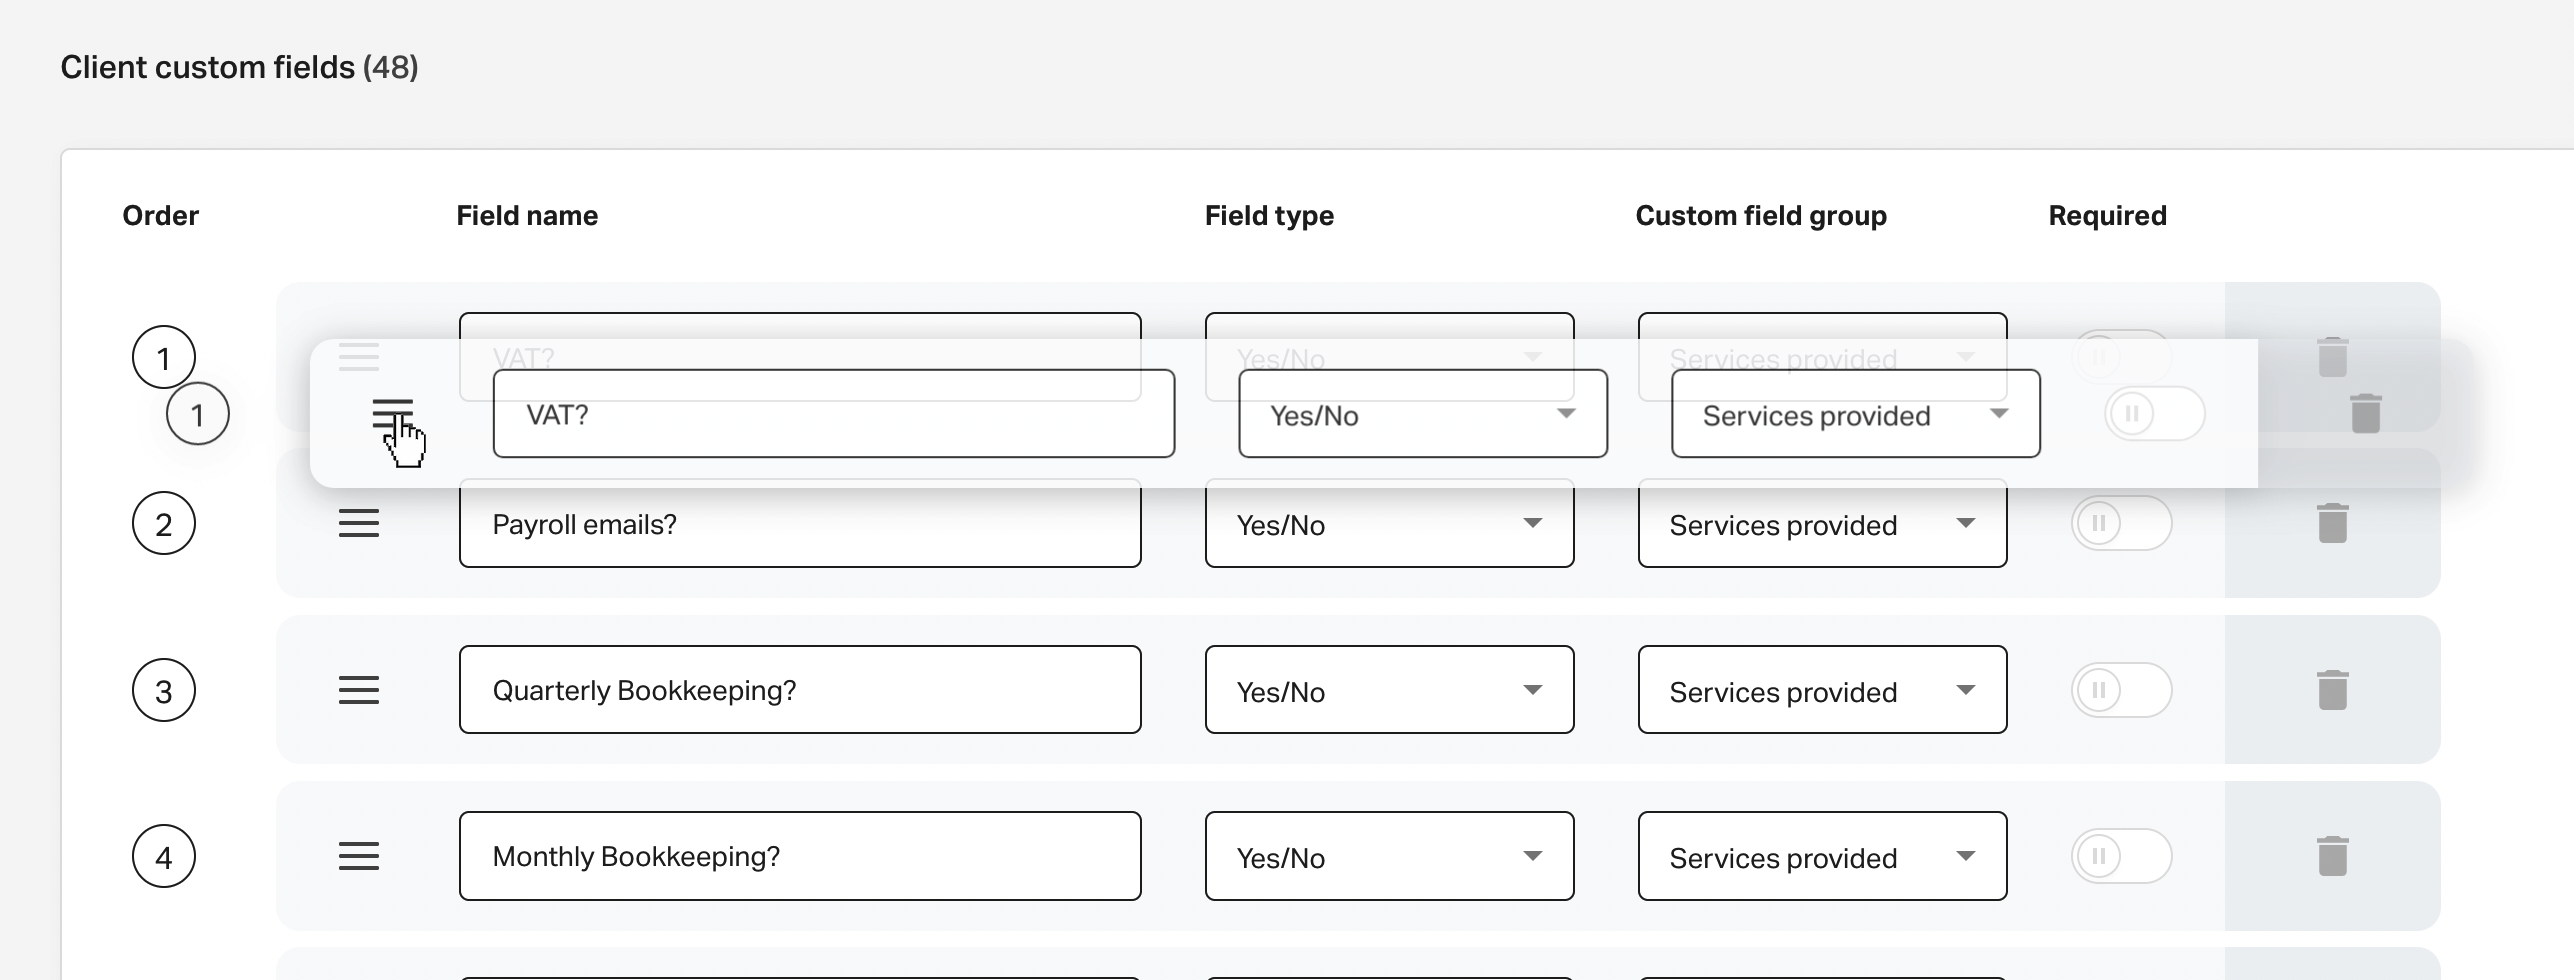
Initially, your client fields will appear in the 'default' field group. If you have a lot of custom fields, or if you use a number of fields for a specific purpose, it may be useful to group them together for easier visibility.
A couple of examples for using custom field groups would be because you want to group all of the fields about your clients' compliance information, their key dates, or their software information together into one group.
Custom field groups can be created on the next tab in Settings.

Here you can create and order your groupings.
Select whether, when viewing a client record, a group should be expanded or collapsed by default. If you have information that rarely needs to be accessed, you may want to set the field group to be collapsed.
You can also reorder these as with your custom client fields, by clicking and dragging them into place.
When you're happy with the groups you've created and the order they are in, click Save all changes.
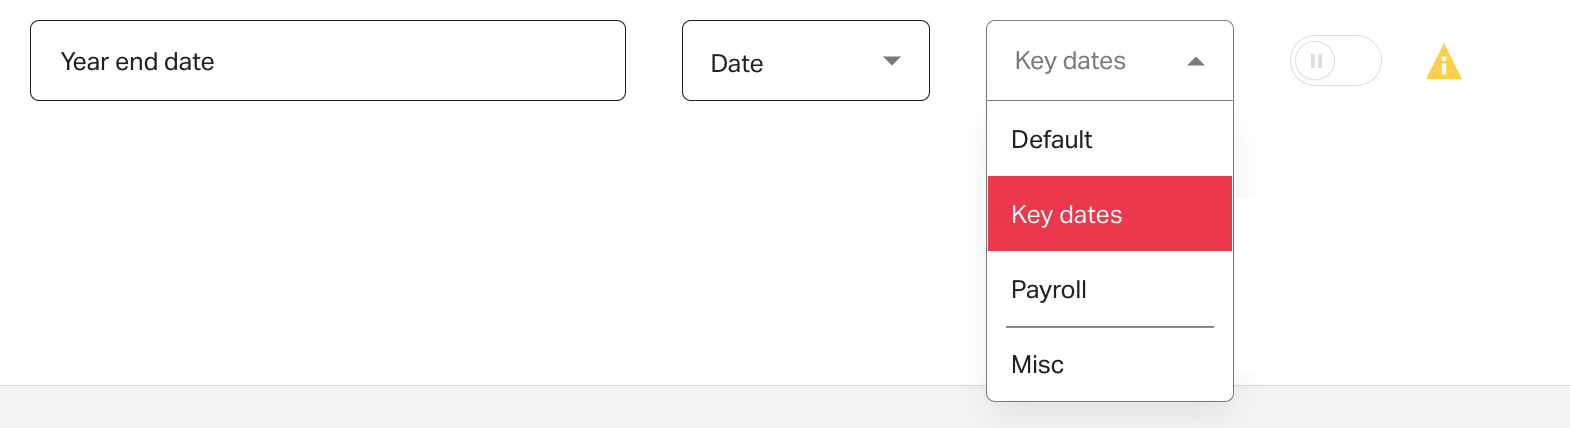
Then, go back to the client fields tab, and against each field, select which group the field should appear in:
On the client record, the fields will be organised into the chosen groups and in the order you have arranged. Each group will collapse/expand as selected.