Similar to labels in other applications, tags can be assigned while working through tasks. They can also be added to templates, so every task created using the template will automatically have these tags attached.
Tags can be used, for example, to indicate task status, urgency, or type of client, and are displayed in the Task list and other locations where tasks are listed.
Note that the Overdue tag no longer exists and is instead applied automatically to tasks past their due date by the due date, which are not marked as complete.

To view, edit, or add task tag, click Settings across the top of your workspace and open the Task Tags tab.
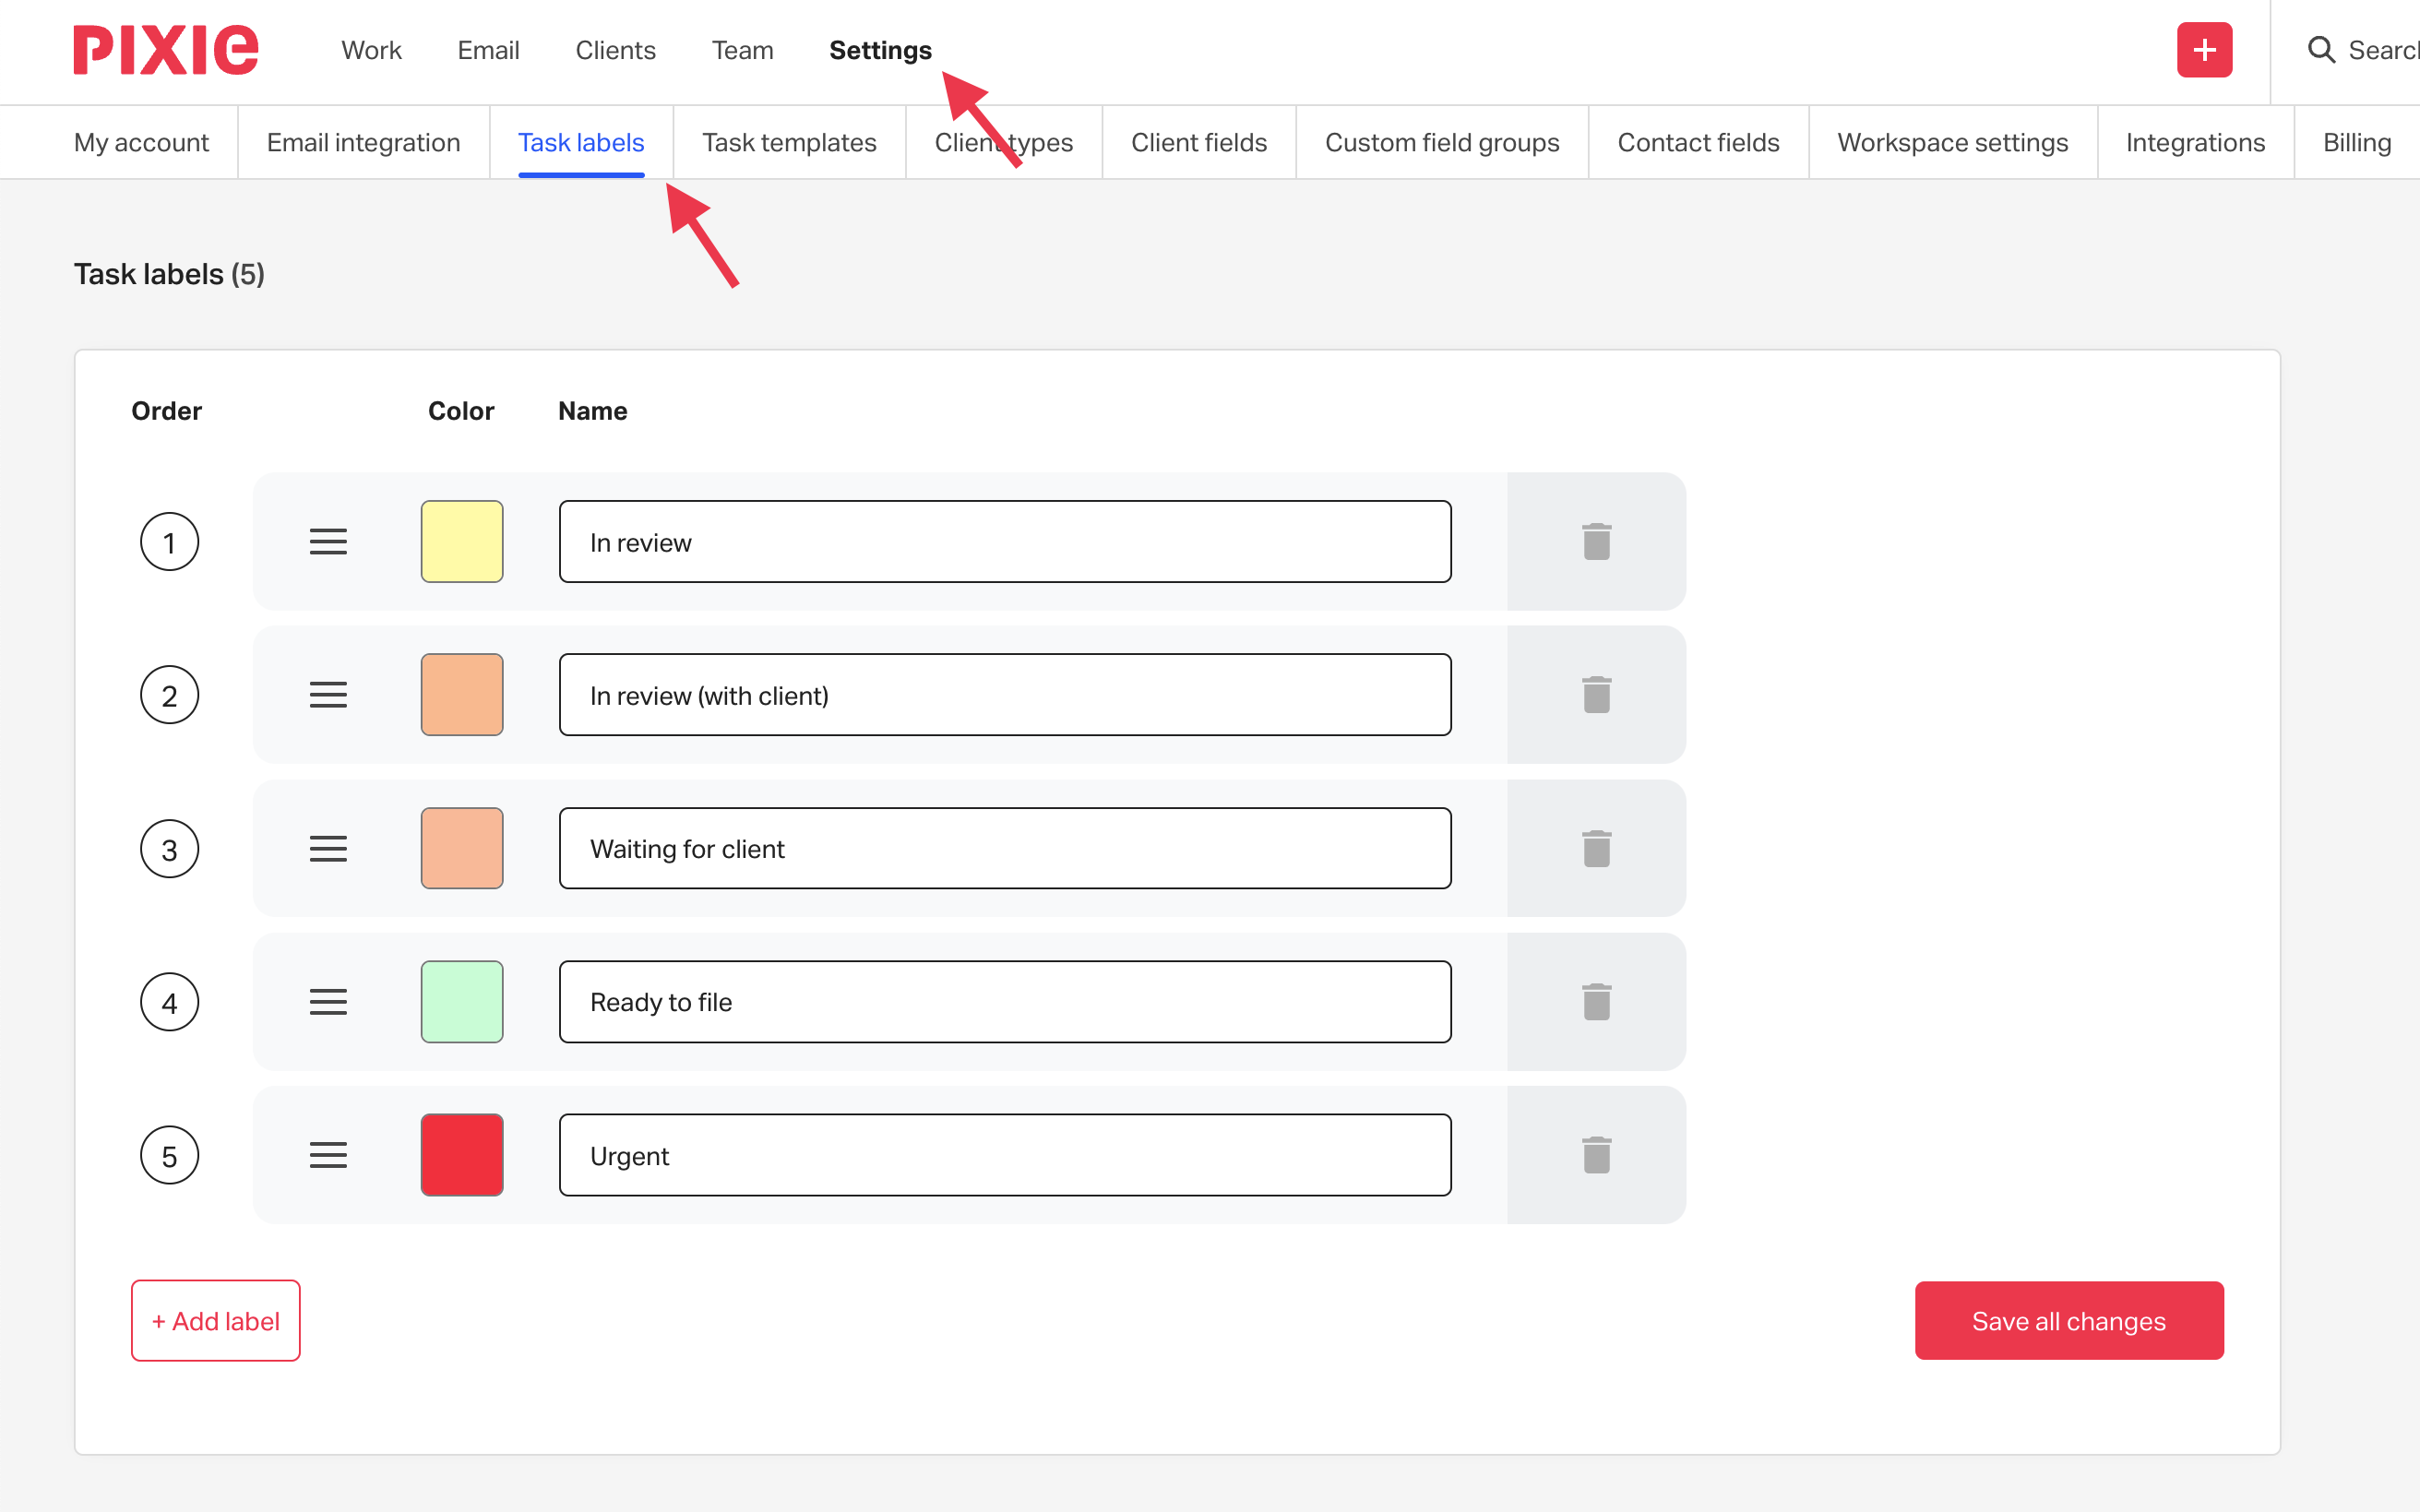
Several default tags are provided, and you can add more as needed. You can edit the name of each tag or click its colour swatch to set the tag’s background colour. Be sure to click Save all changes when finished.
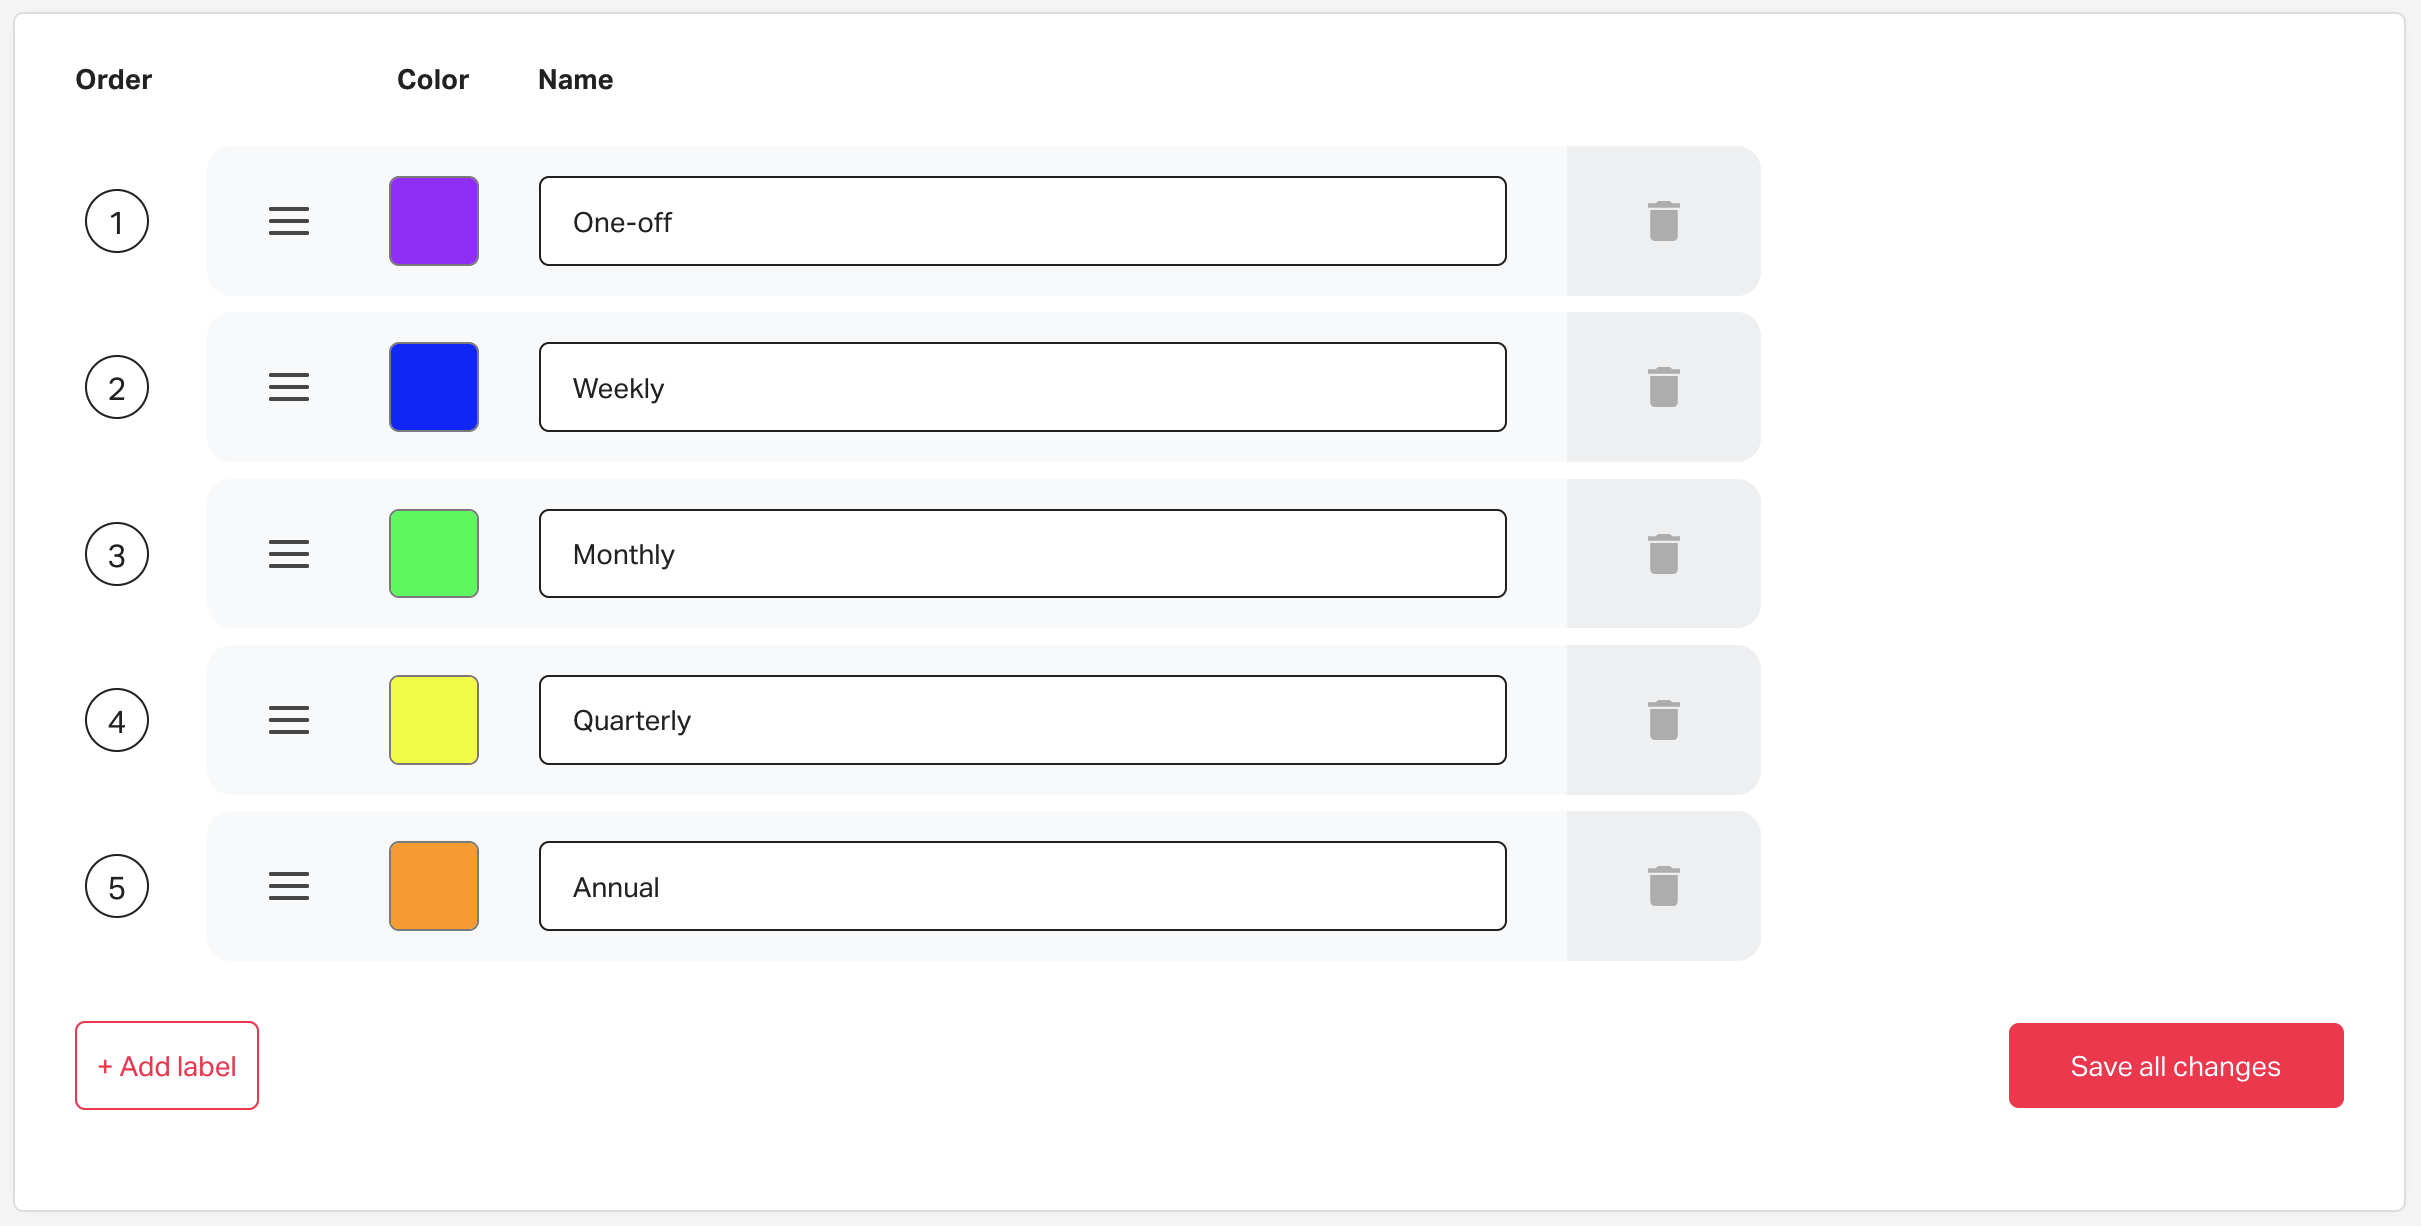
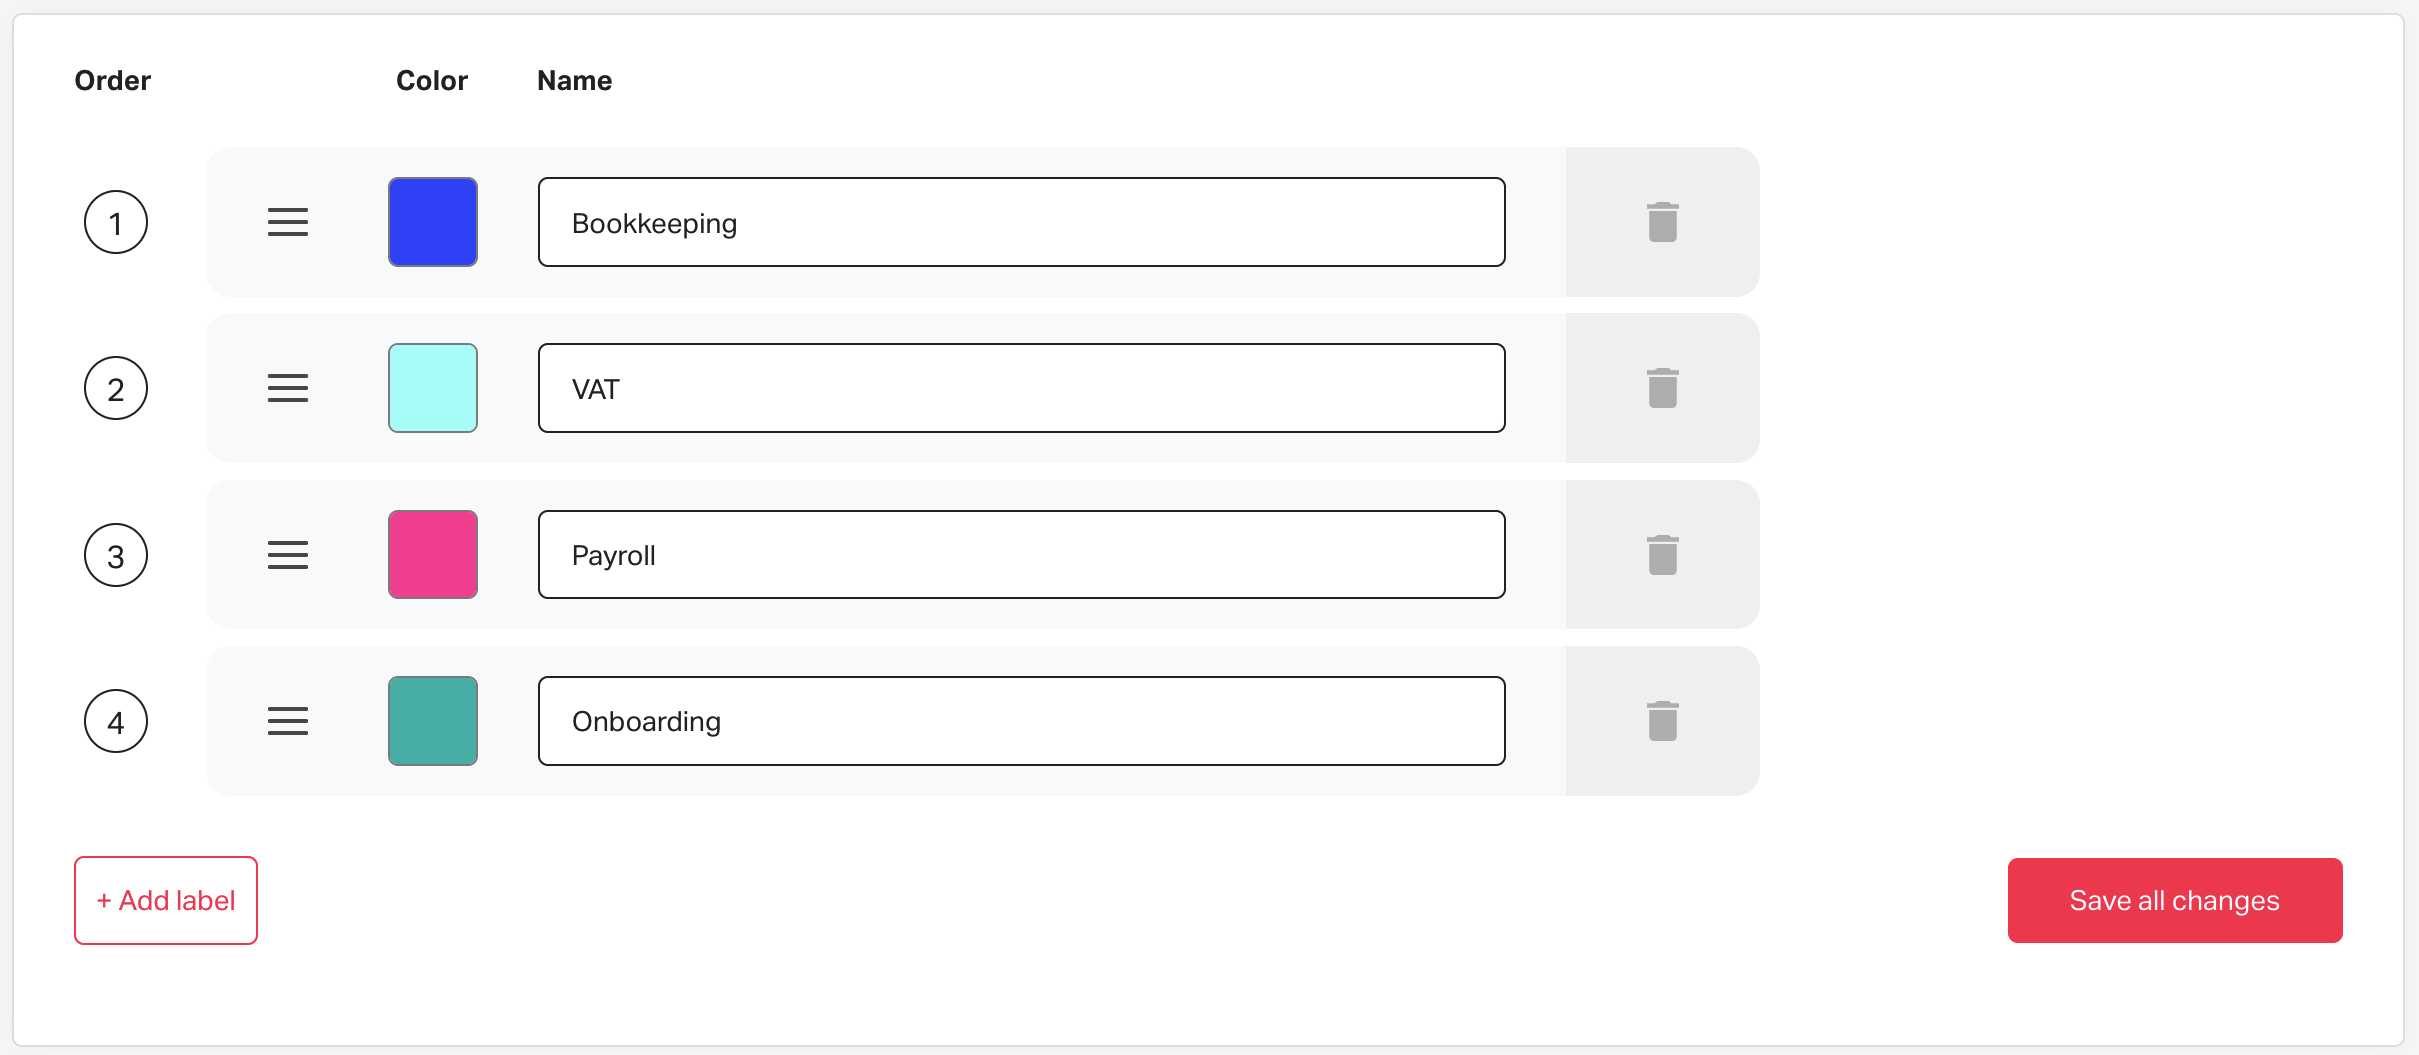
Some Pixie users find it helpful to create colour-coded tag groups. For example, task frequency, client types, service packages, or internal tasks.
Tags are automatically displayed in the order they are created, so when you create a new tag, it will appear at the bottom of the existing list.
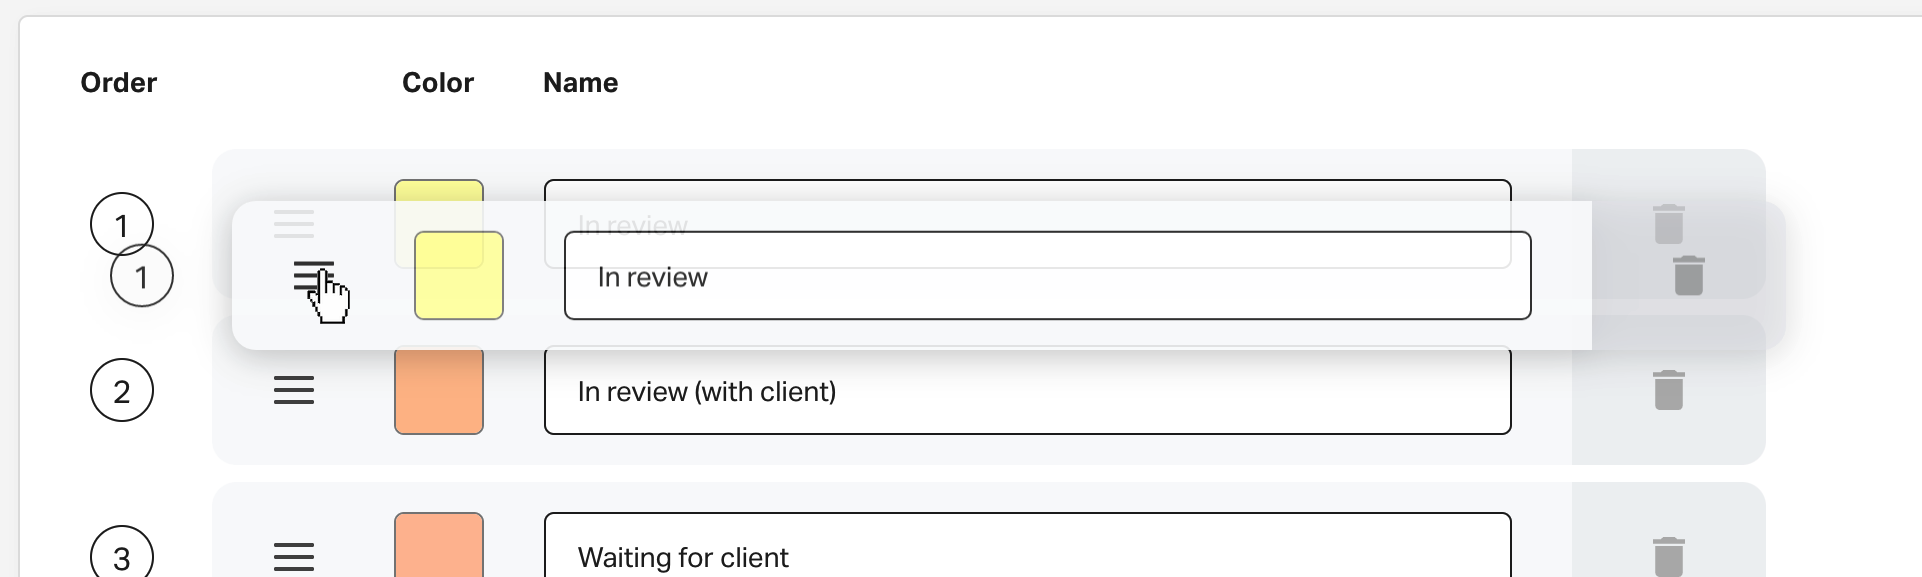
To reorder your list of tags, click and drag them into the order you desire using the three bars to the left of the Colour choice and remember to Save all changes when you're finished.
See also:
