Before using your shared inbox, please ensure that you're familiar with Pixie's email integration; we have a full guide on this here.
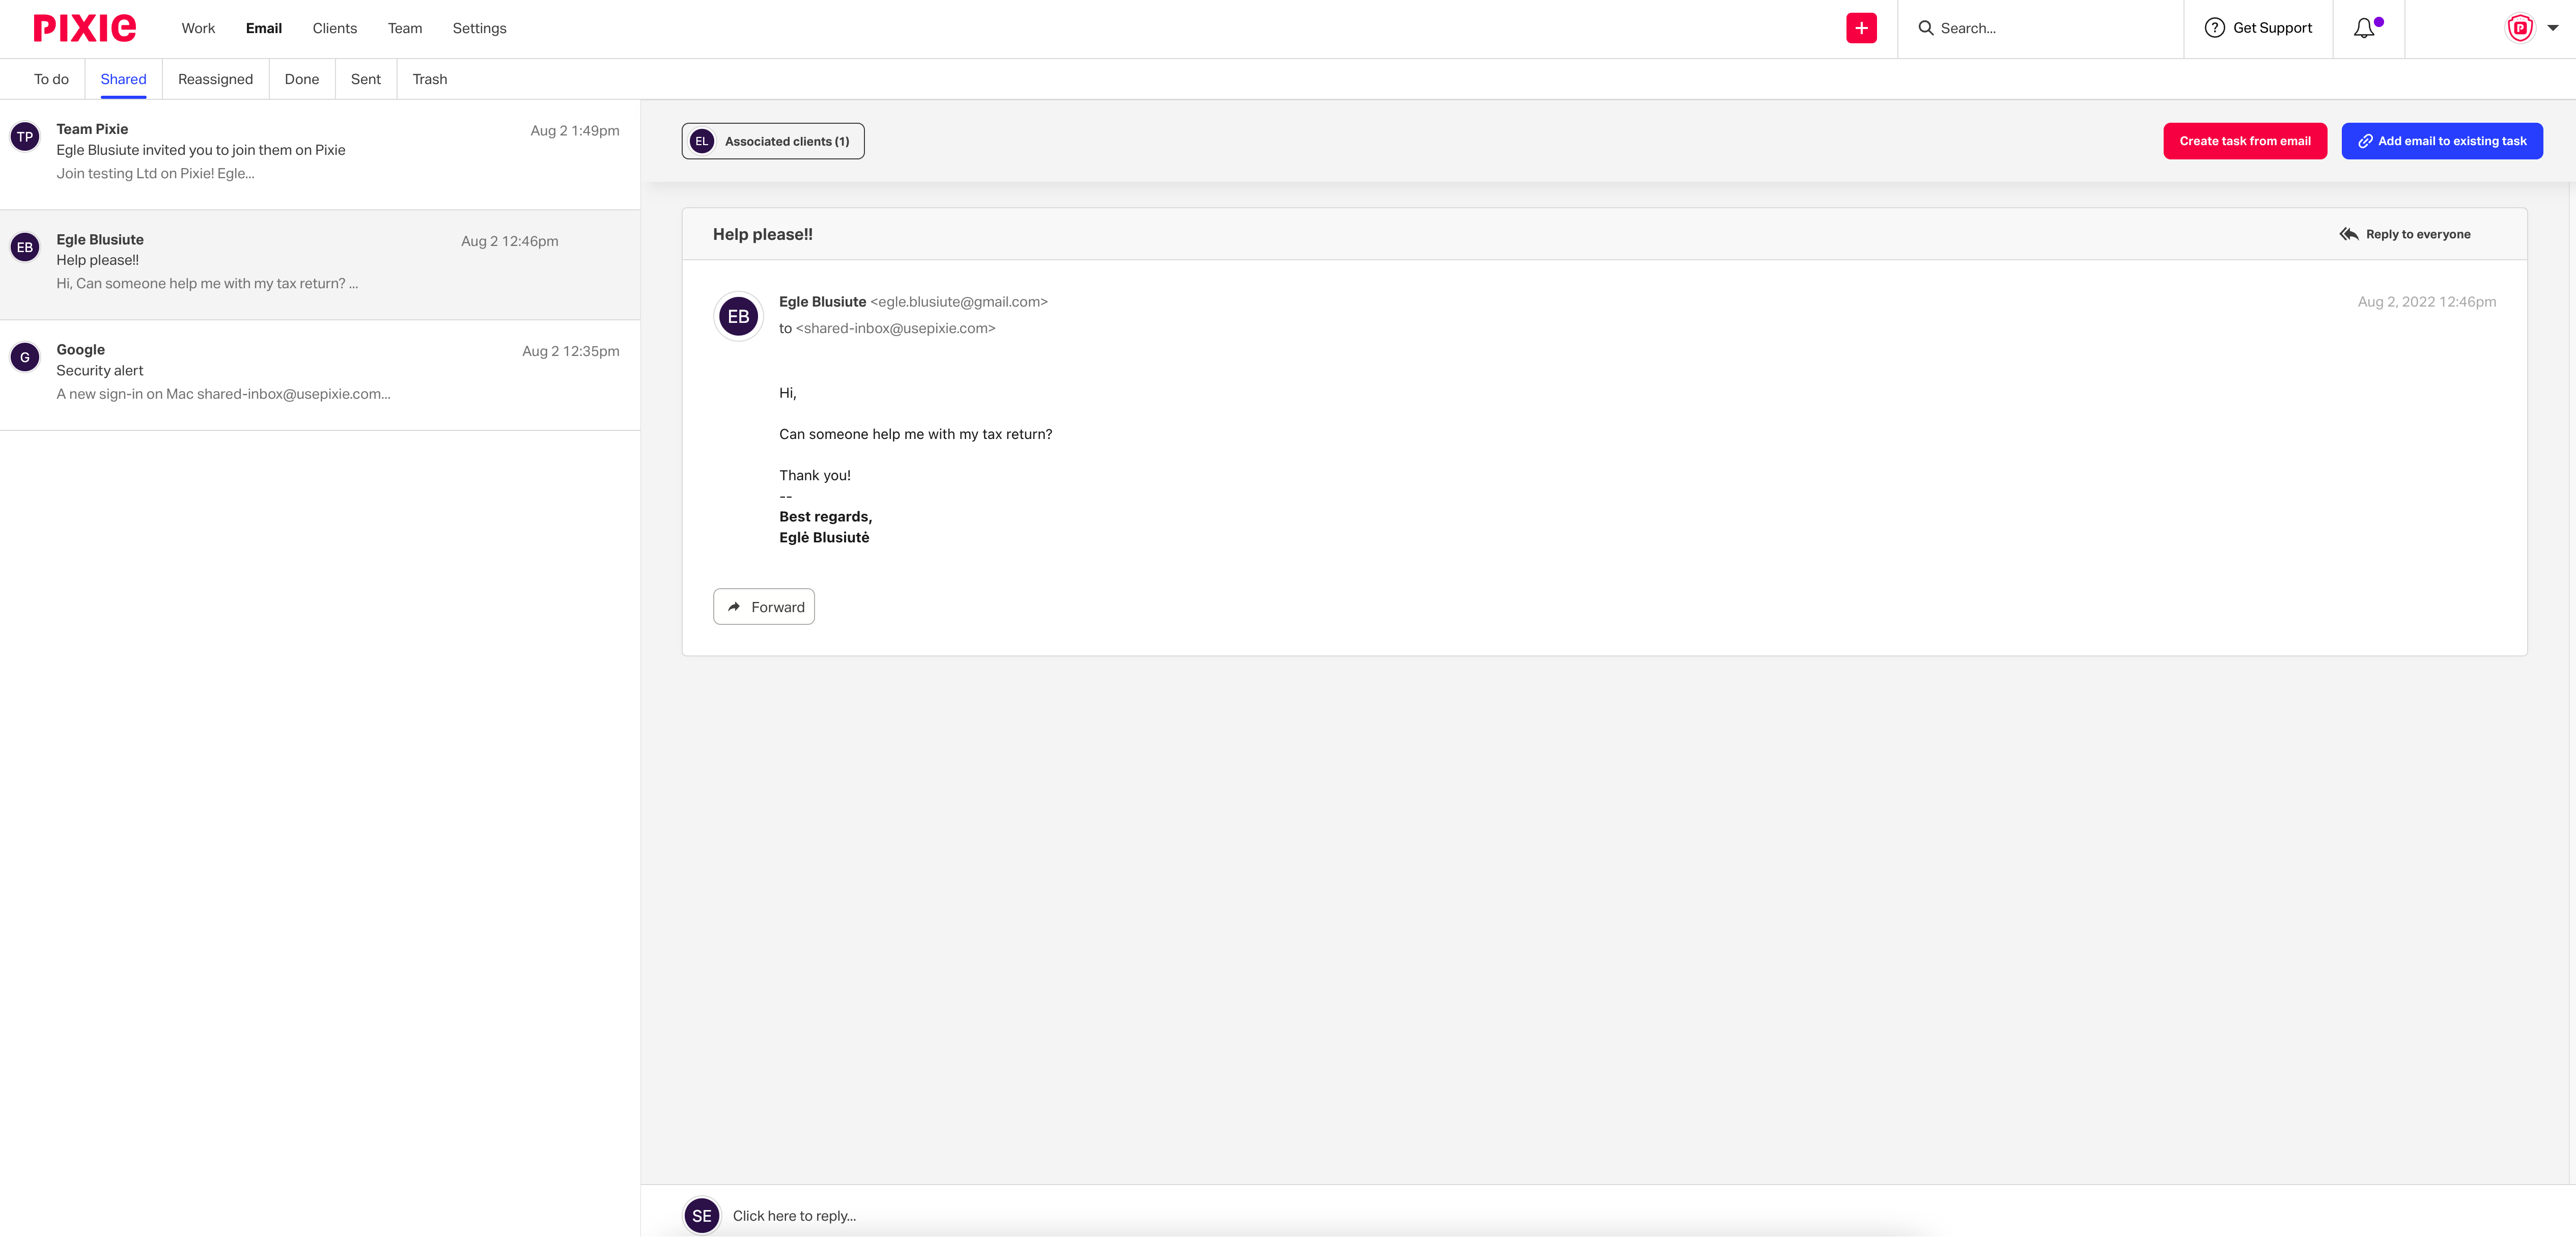
Once you've set up your shared inbox, the first thing you're able to do is to access the inbox directly.
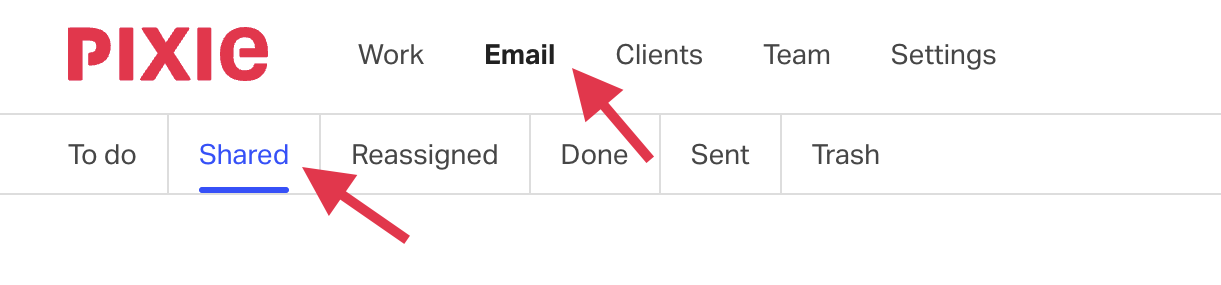
To do this, go to your Email tab, then select Shared.
When the inbox has loaded, it will look almost the same as your regular inbox in Pixie, and you'll be able to reply, create or link a task, and associate clients with these email threads in the same way. If you reply to an email in the shared inbox, your reply will be sent from the central email address.
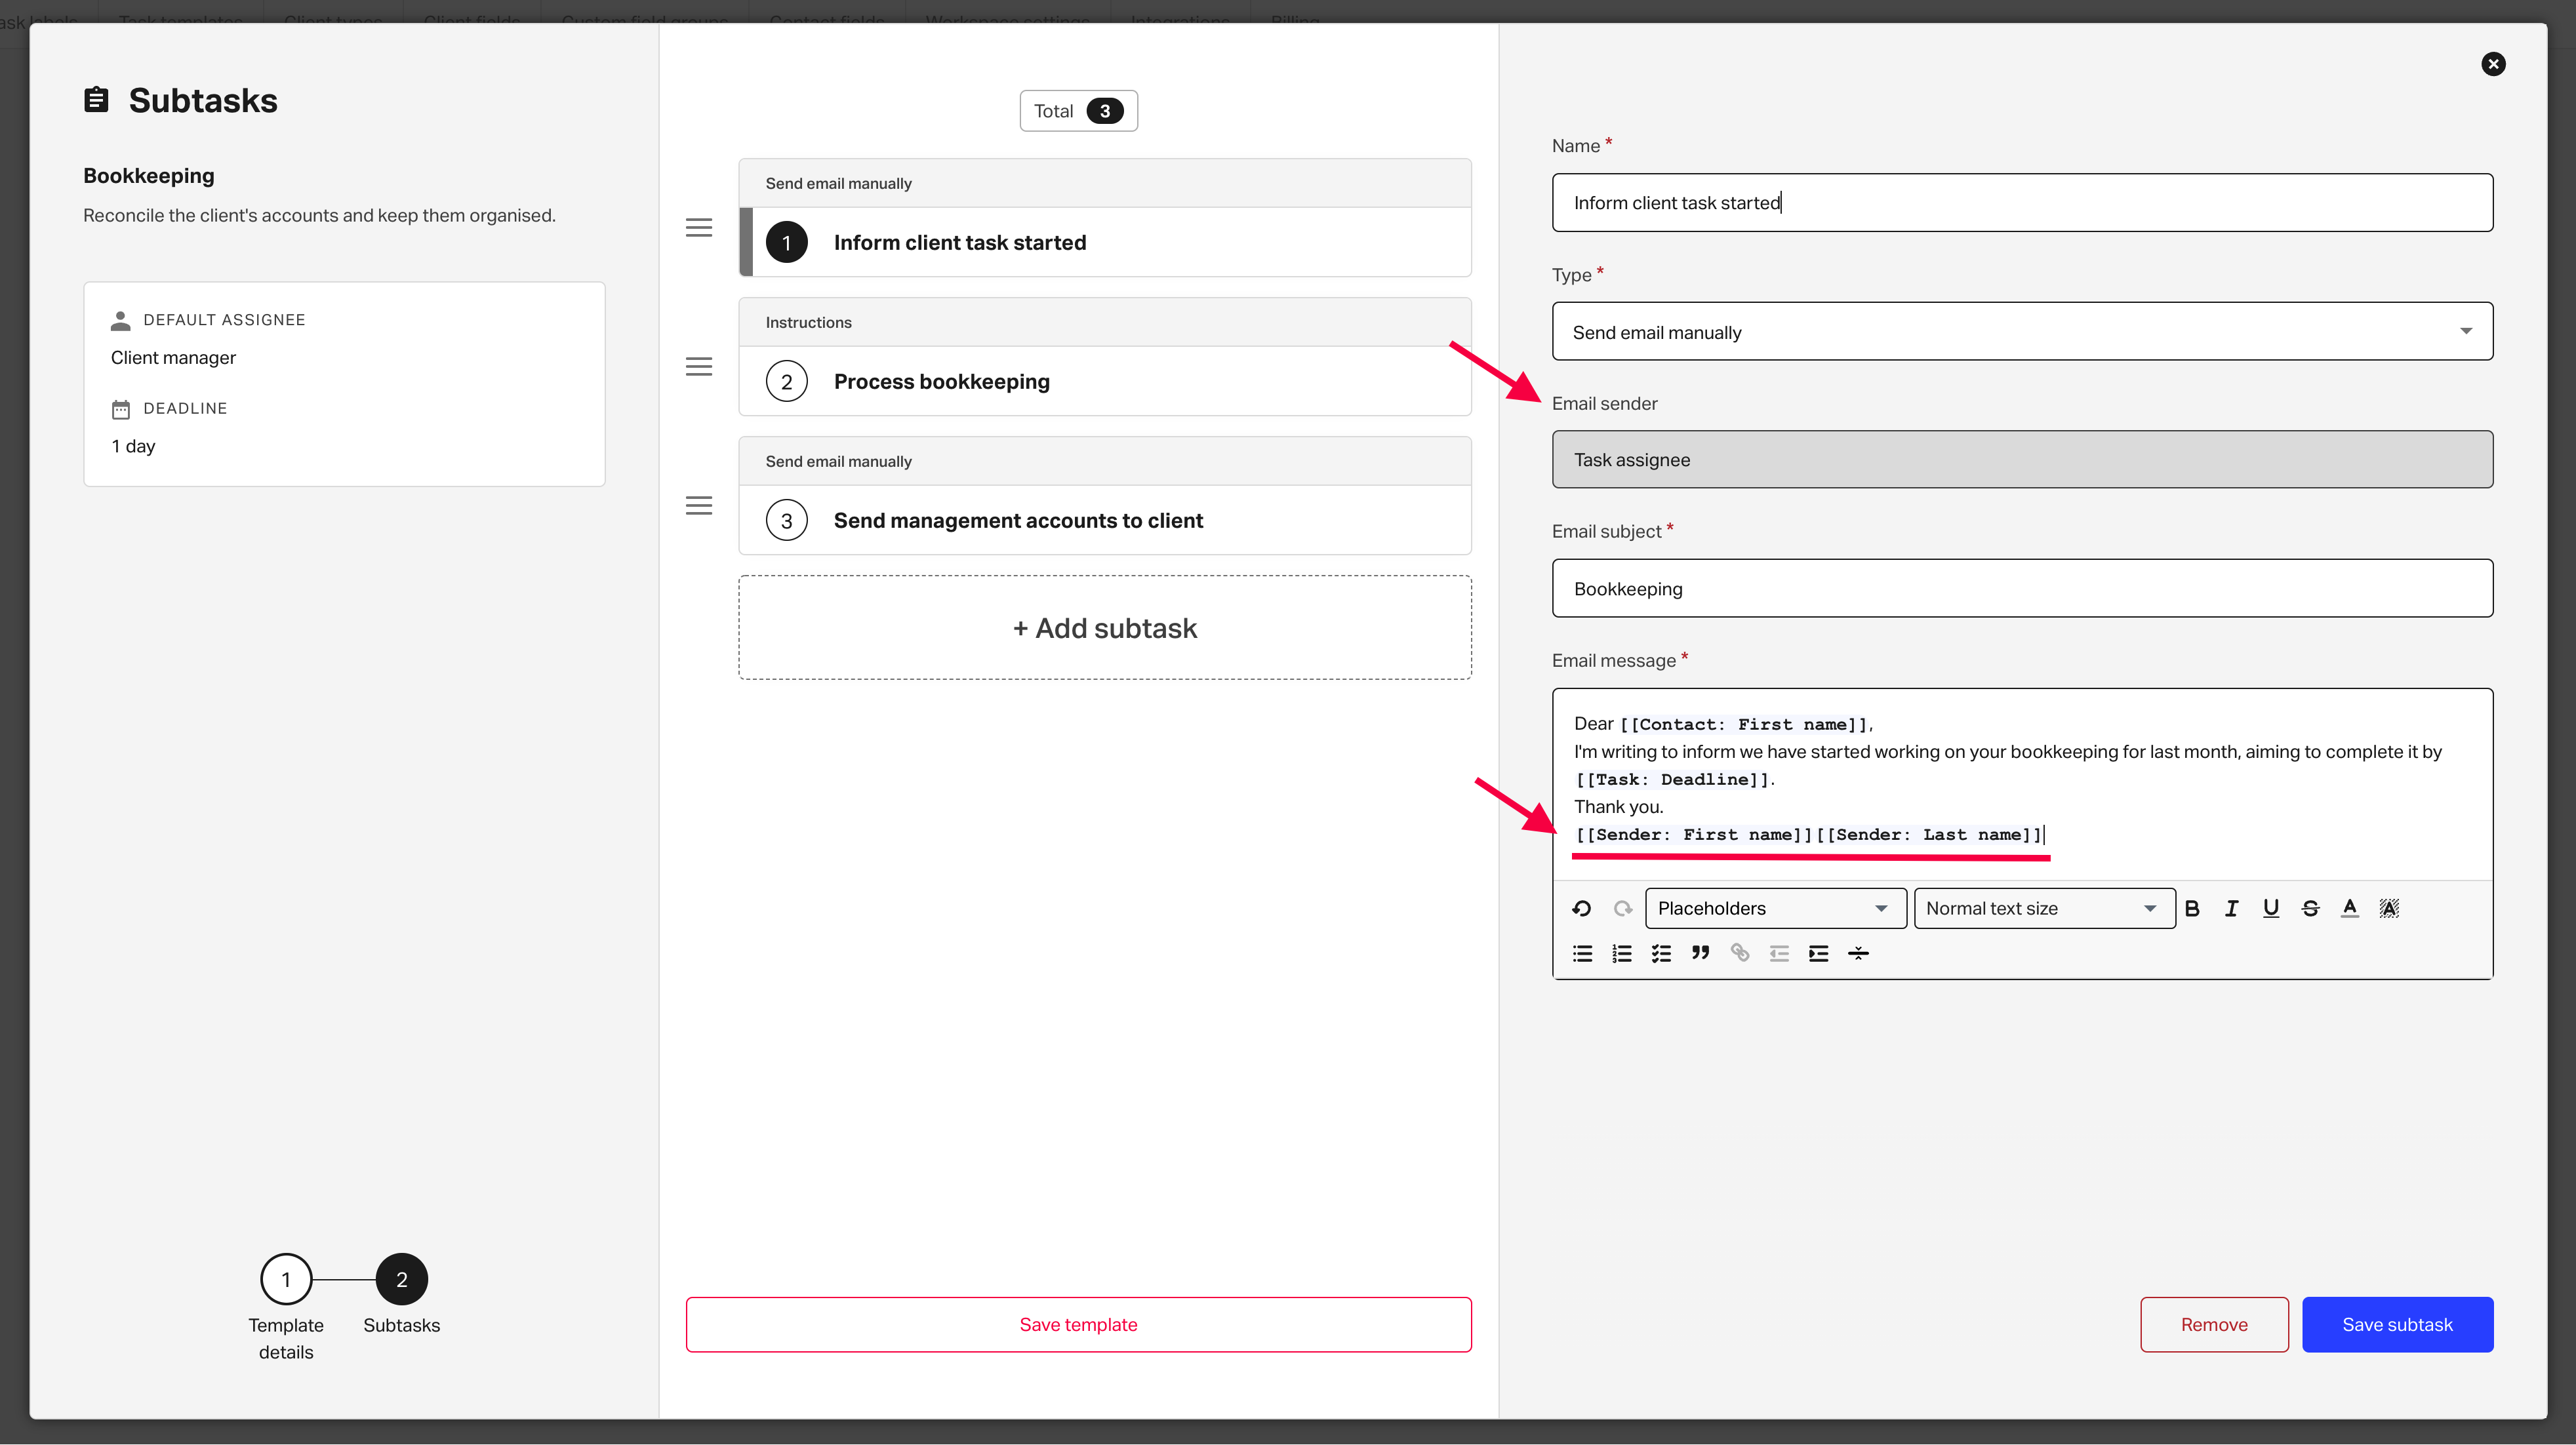
If you've enabled Force auto and manual email tasks to send from the shared inbox in your workspace settings, any emails within tasks will also be sent from this central email.
You don't need to change anything in your tasks as the settings in the workspace will override the sender settings in the subtask, but we would advise that you make sure any emails that use placeholders that use the sender's details are correct as the sender will now be the shared inbox user.
Once you've sent an email or replied to one using the shared inbox, you will be able to see the email in the client record and task (if applicable) as usual.
